How to set up a metric in Tenacy ?
Summary
2. Where can I find the operational metrics offered by Tenacy?
3. How do I instantiate a metric from the catalogue?
4.2 Creating an indicator fed by the metric created
5. Link a metric to a recurring task
1. What is a metric?
💡 A metric is a number/value that is collected at regular intervals in the solution.
There are 2 types of metrics in Tenacy:
- Internal metrics, for which the data is collected automatically by Tenacy through the creation of objects.
- Operational" metrics, which require data to be entered into the solution on a regular basis, either manually or via an xls import.
💡In this article, you will find more details about the differences between the 2 types
2. Where can I find the operational metrics offered by Tenacy?
Go to ⚙️ Cogwheel > Catalogue > Metrics.png)
3. How do I instantiate a metric from the catalogue?
You can retrieve a metric already present in the Tenacy catalogue to instantiate it in your environment.
To do this, go to ⚙️ Cogwheel > Catalogue > Metrics > Operate metric
.png)
Then you have to choose the perimeter or grouping on which you want to operate the metric:
.png)
💡 You can also "copy" a metric from the catalogue to take advantage of the metrics already present in the catalogue and "customise" the metric as you want.
For example, you may need to collect a metric at a different frequency from that indicated on the metric in the catalogue.
To do this, click on Create copy:.png)
4. Create a metric
4.1. Create the metric
To create the metric "from scratch", go to Dashboards > "Metrics" tab > "Add a metric"
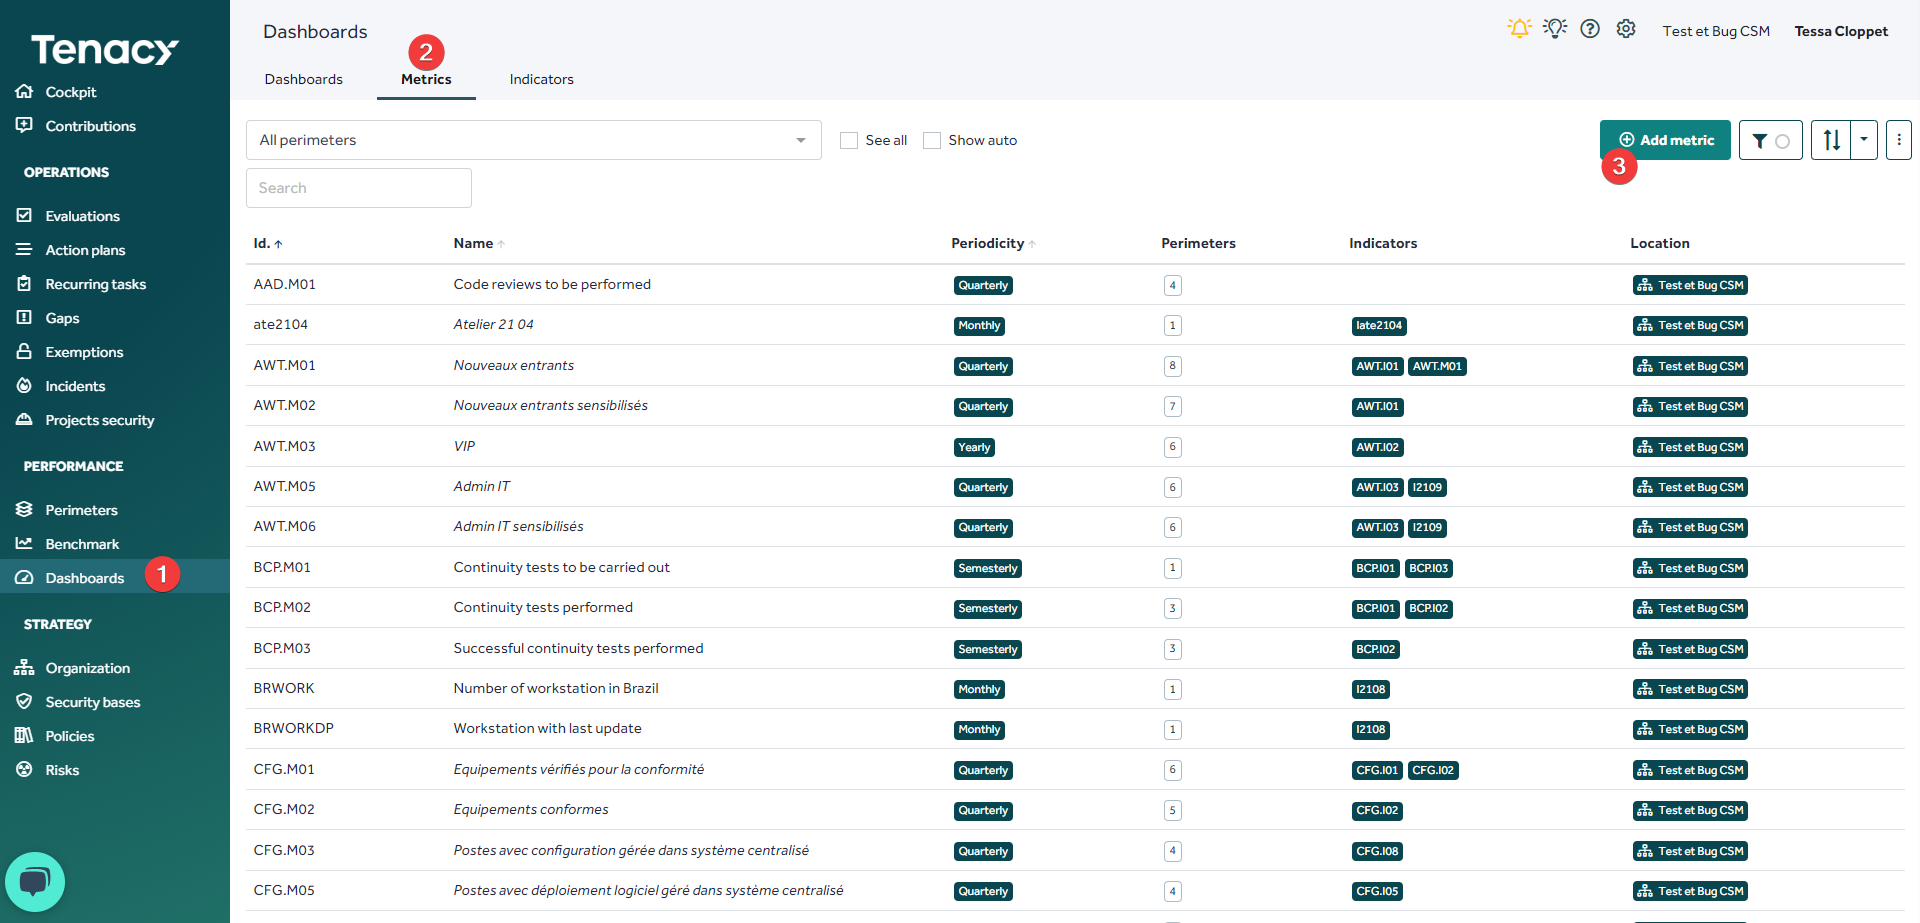 Then choose the parameters:

- Metric name: enter the desired name
- Identifier: not mandatory, if you leave this field empty the solution will automatically generate an ID
- Frequency: ⚠️ once there is a history of data entered, you can no longer change it!
- Grouping / Perimeter: allows you to automatically associate the metric with the associated groupings or scope.
💡If you have a perimeter that collects the metric for another perimeter, you can, by going to the "Assignments and delegations" tab, choose the collecting perimeter and/or the user/group of users who will collect your metric in the desired perimeter.


4.2 Creating an indicator fed by the metric created
Once the metric has been created, you can create an indicator containing this metric.
See how to create an indicator in point 5 of this article
4.3 Import a metric
You can also import metrics massively into the solution.
To do this, go to Dashboards > Metrics > Import XLS :.png)
5. Link a metric to a recurring task
In your ![]() "Recurring tasks" tab, click on a RT then on the "Metrics" tab.
"Recurring tasks" tab, click on a RT then on the "Metrics" tab.
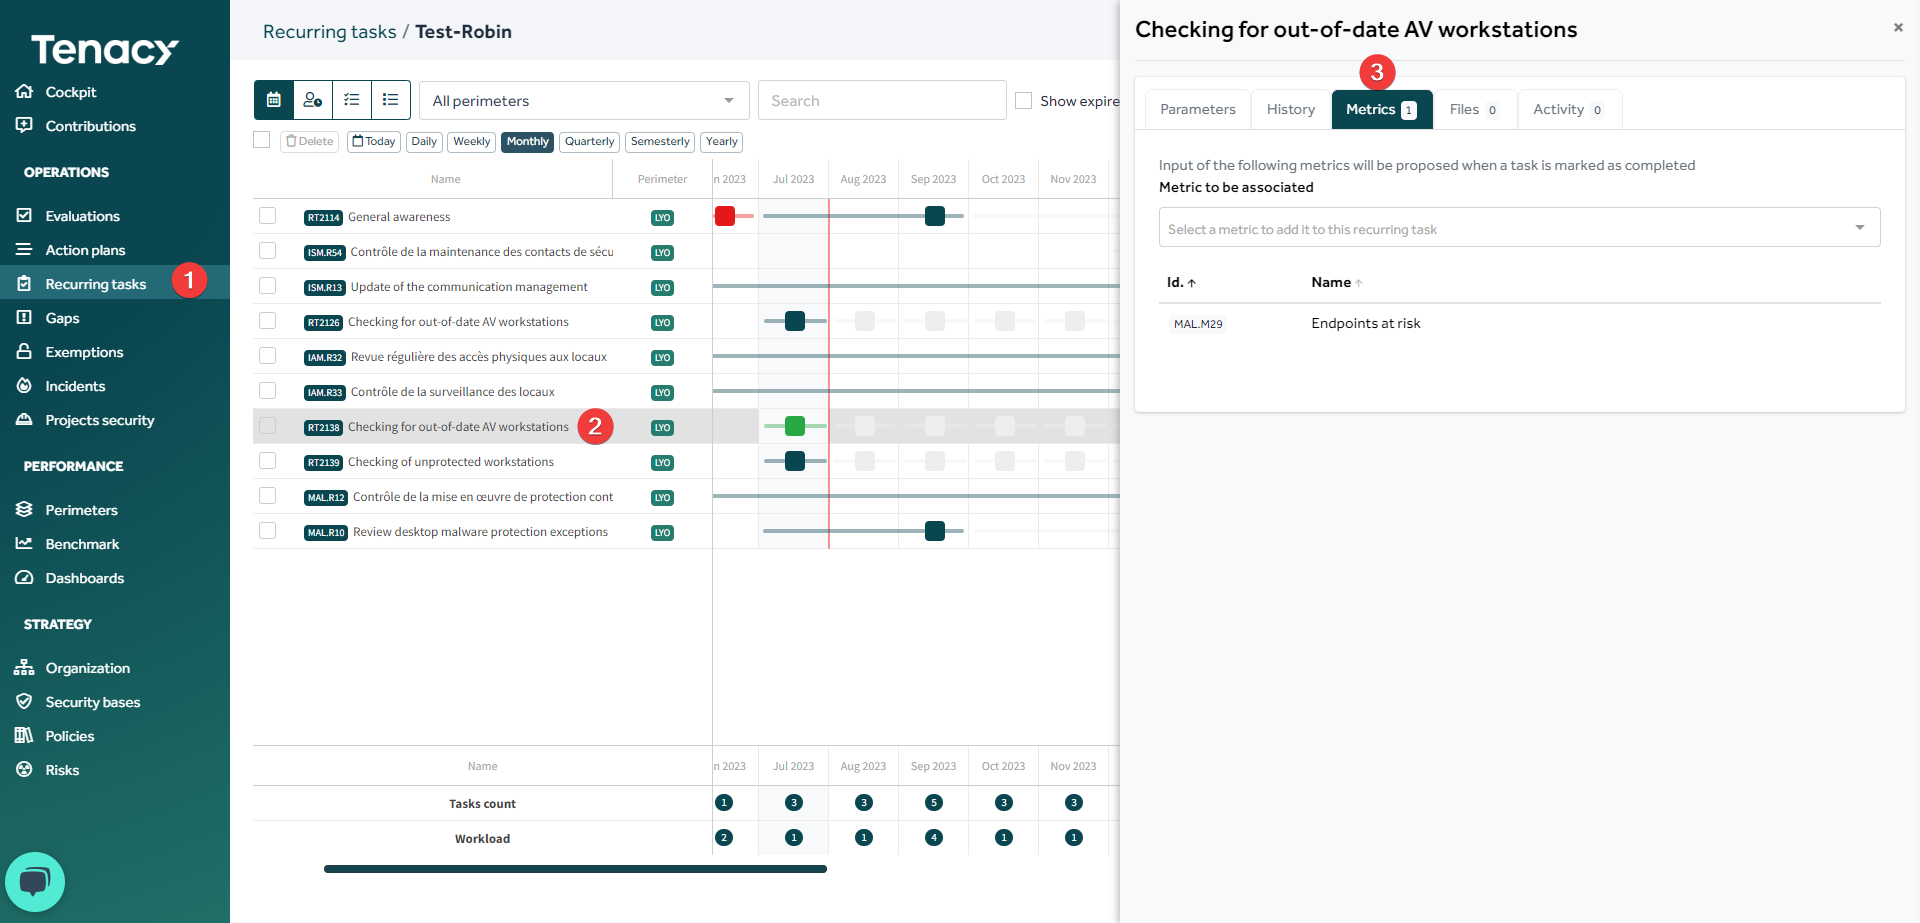
Under "Metric to be associated" you will have access to proposed metrics.
🔎 These metrics are themselves from indicators which are attached to the same measures as your recurring task.
For some recurring tasks, in the "Metrics" tab, it is possible that no metrics are being proposed to you.
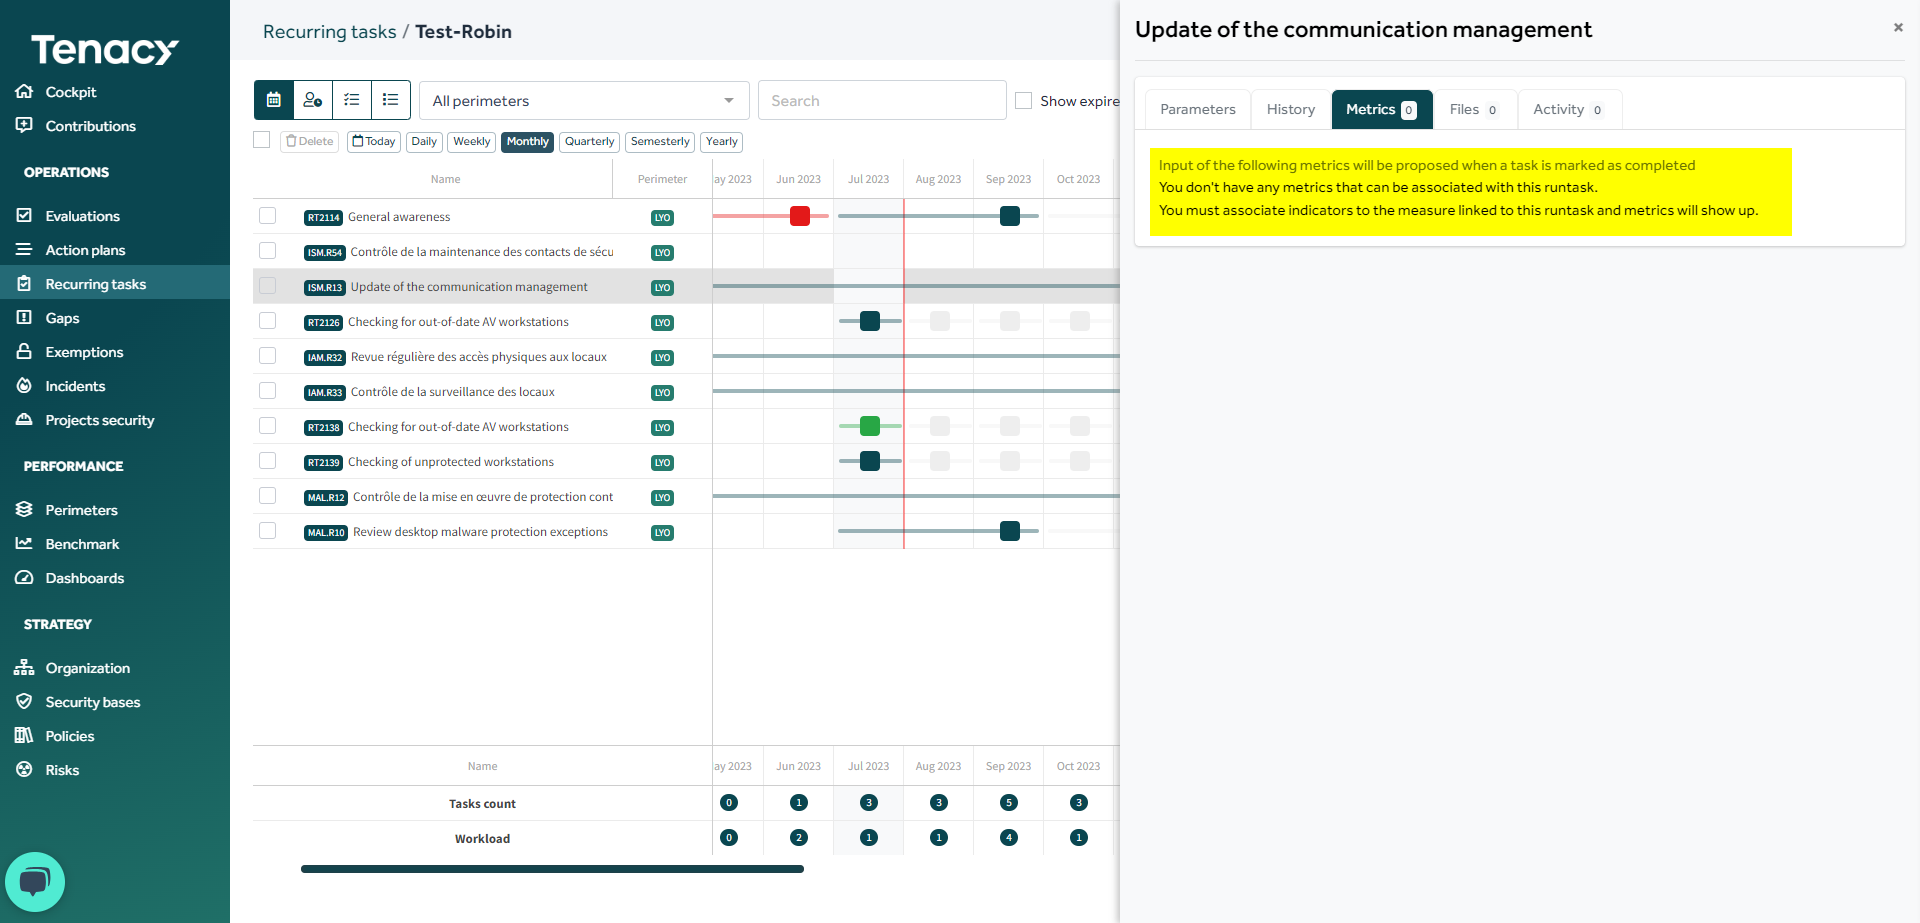
As you can see, it is necessary to associate, in advance, the indicators (and therefore the metrics) to the measures that the recurring task will control.
6. Perform a test
In order to verify that the configuration suits you, you can perform a test by validating a RT to which you have associated your metric.
Go to "Recurring Tasks", select the register where your RT is stored, then click on the blue box to access the completion panel.
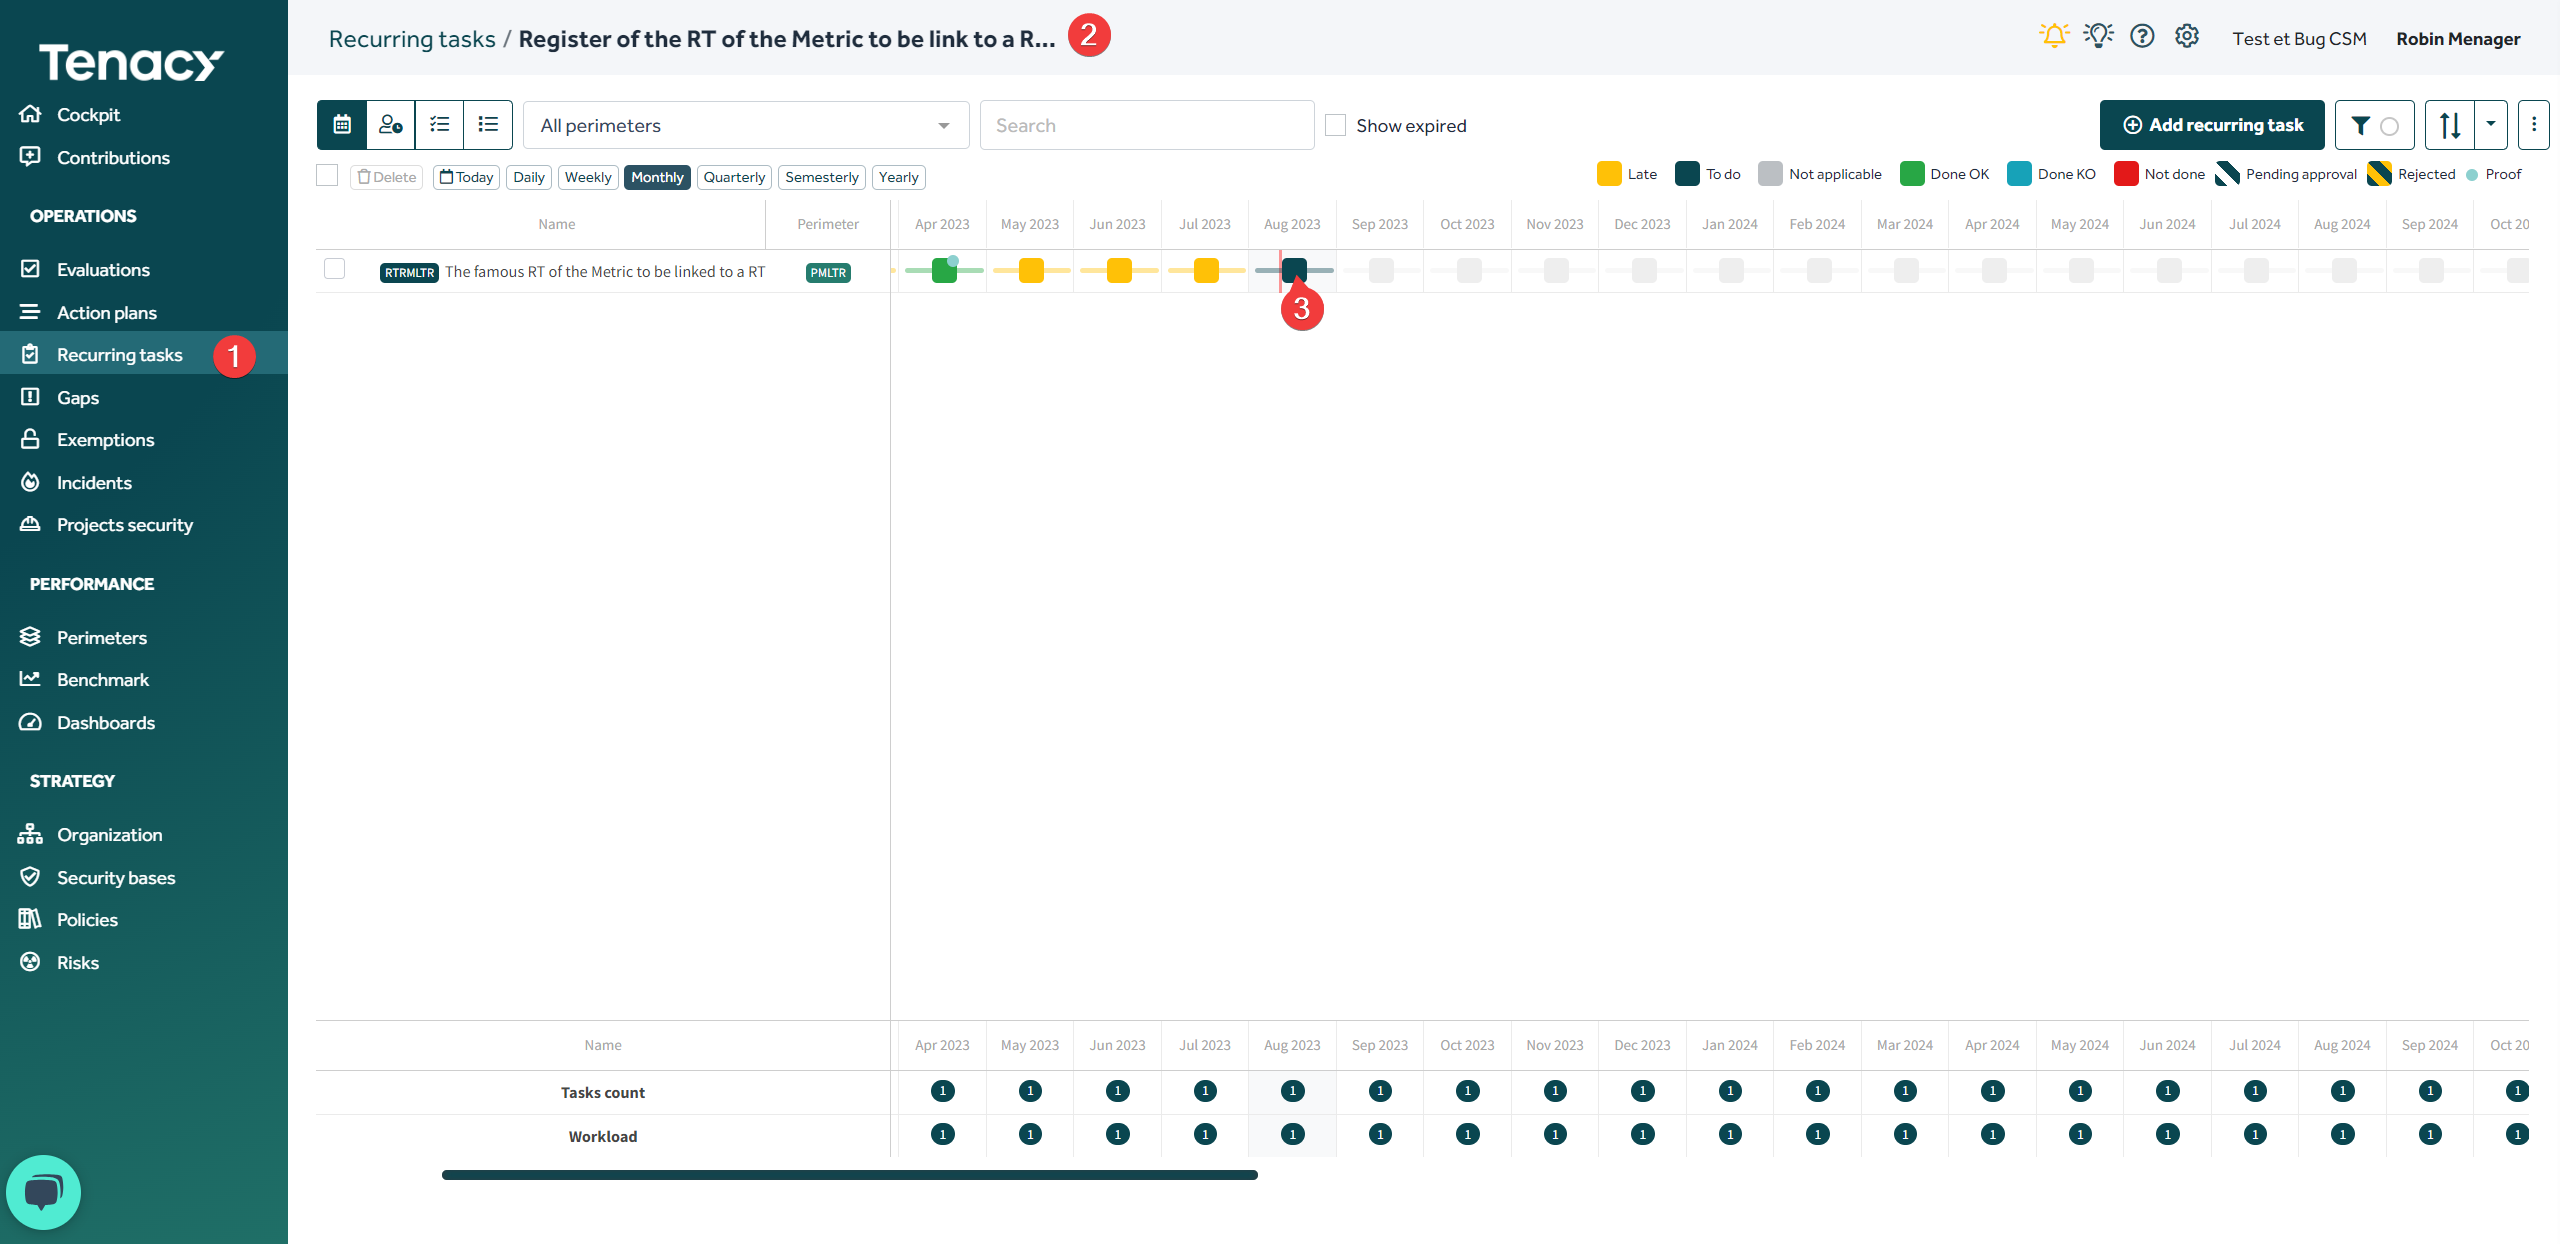
Switch the RT to "Done" then click on "save". A pop-up appears to enter the metrics associated with your RT.

In addition to the values entered, you can associate a comment if necessary.
Finally, if you wish to modify the values entered for a metric during the performance of a RT, you can click on the performance date that interests you, click on "save" then modify or delete the values that appear in the pop-up.

7. Delete a metric
To delete a metric instantiated in your environment, go to Dashboard > Metrics then click on the 🗑️ icon:
.png)
⚠️ In order to delete a metric, it must not be used by any indicator. If this is the case, you must first delete the indicator containing the metric before you can delete the indicator.