The starter kit (or Start-up Wizard) allows you to carry out an initial configuration in Tenacy. This will help you get your feet wet in defining your security goals and importing existing data.
Summary
-
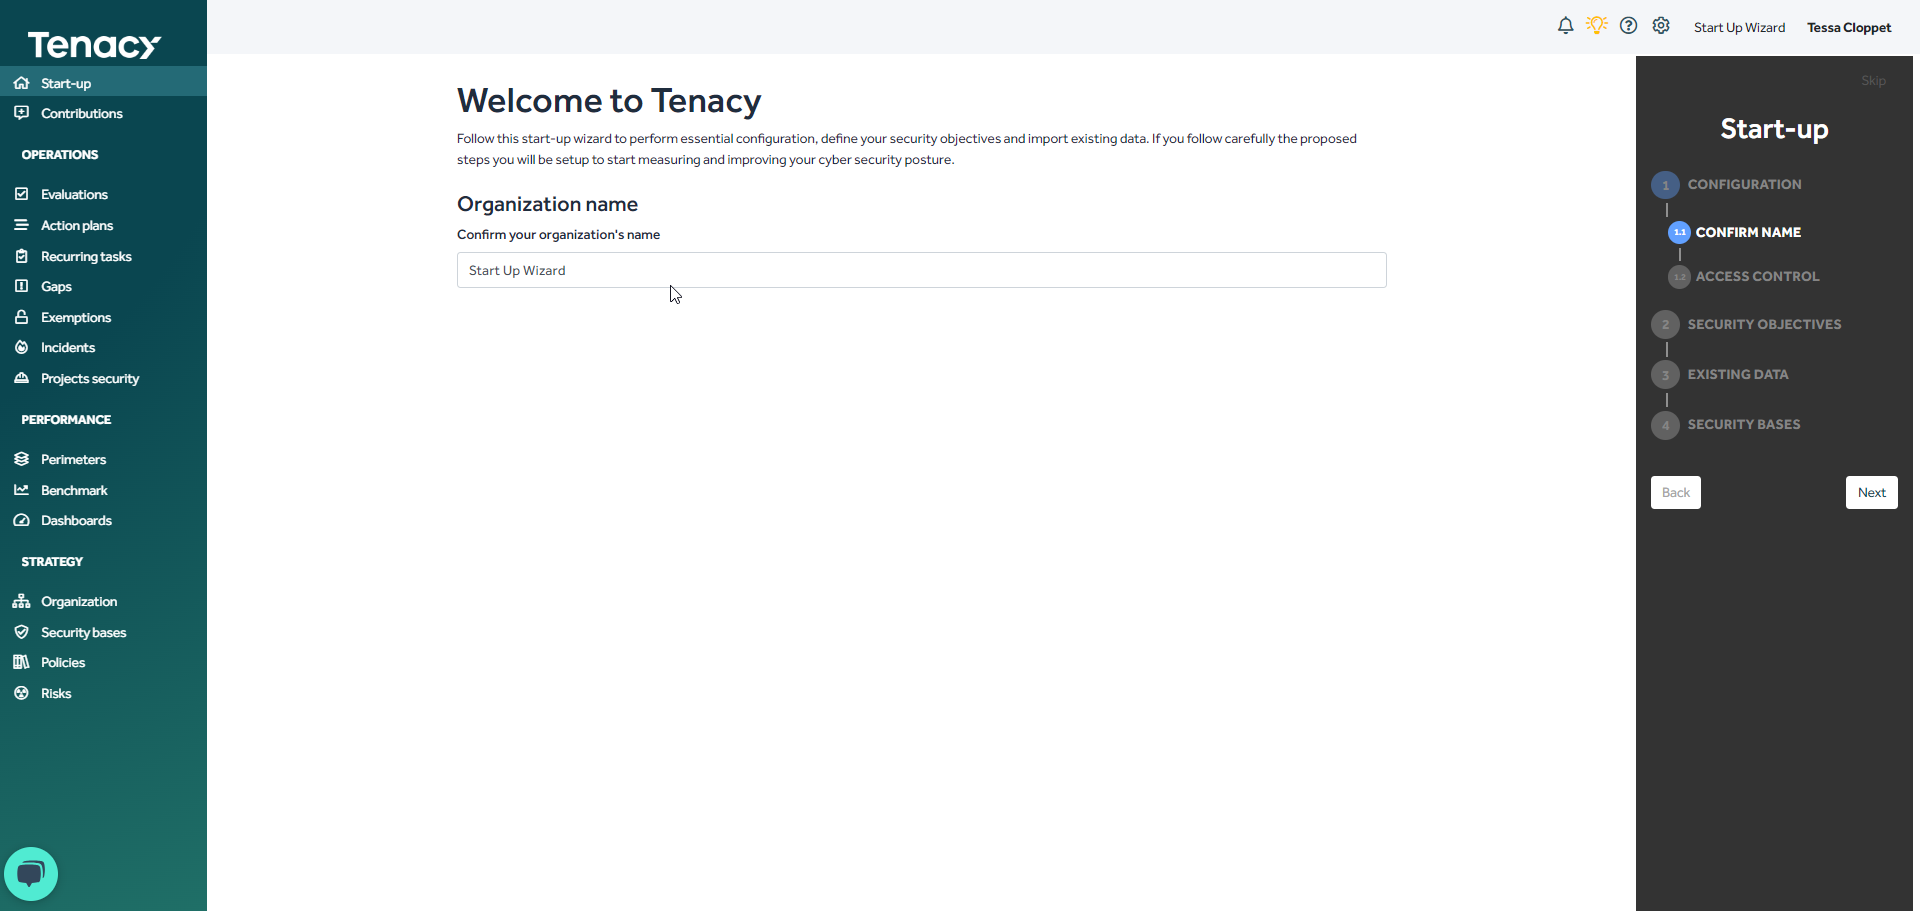
1.1. Account Name
1.2. Access Control
-
2.1. Activity / 2.2. Regulations / 2.3. Certifications
2.4. Custom
2.5. Perimeters
-
3.1. Action Plans
3.2. Connectors
🔎 The Start-up Wizard allows you to make initial configurations. Nothing is mandatory and you can do everything afterwards in the different menus of the solution. It is interesting for you to start in a guided way.
💡 Once the Start-up Wizard has started, you can leave it where you are to change tabs and come back to it later. However, changes will only be taken into account during the final validation of the process.
1. Setup
1.1. Account name
This first step allows you to modify the name of your environment.
🔎Apart from this step, you will no longer be able to rename your account alone. You will need to contact support if you want a change.

1.2. Access control
If you already have the information, you can add your SAML configuration. When you click "Yes", a "Metadata URL" field appears in which to enter the URL of your identity provider.
If you don't have them, don't panic, answer "No" and you can set up the configuration later as needed.
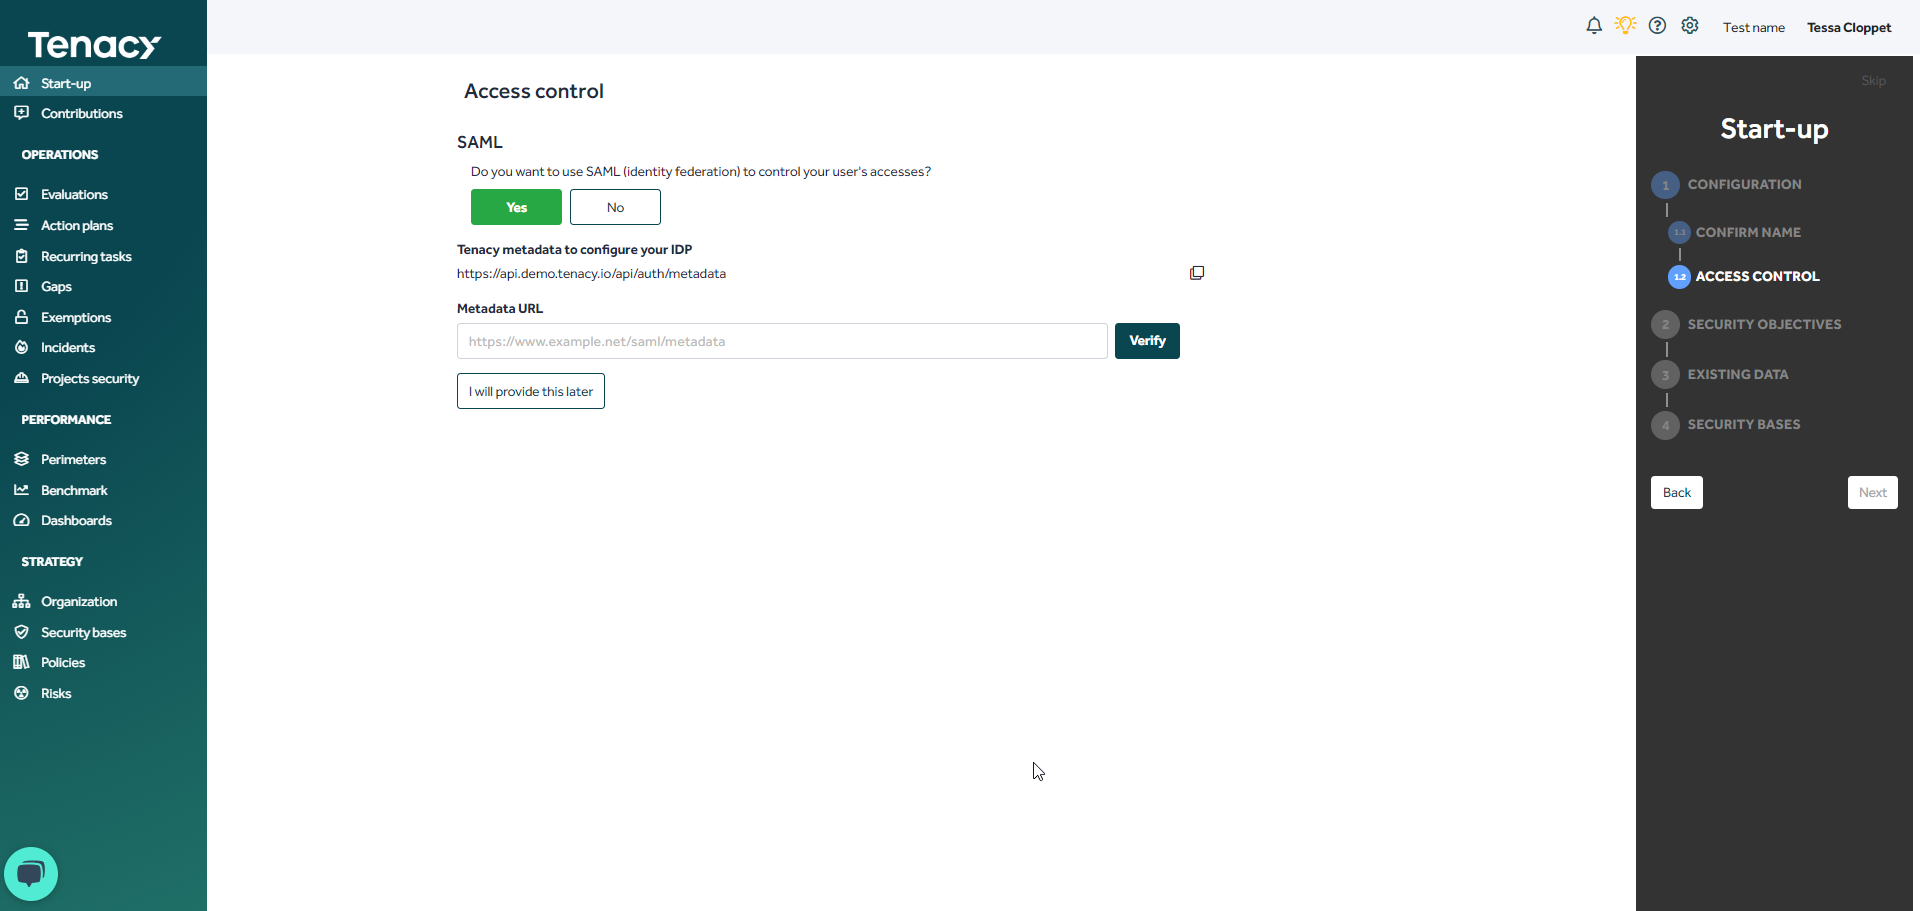
If you answer "No" the solution asks you if you want to configure MFA and either: Force it, leave it to the user's choice, deactivate it.
💡Should we configure SAML or MFA? This article will help you see things more clearly.
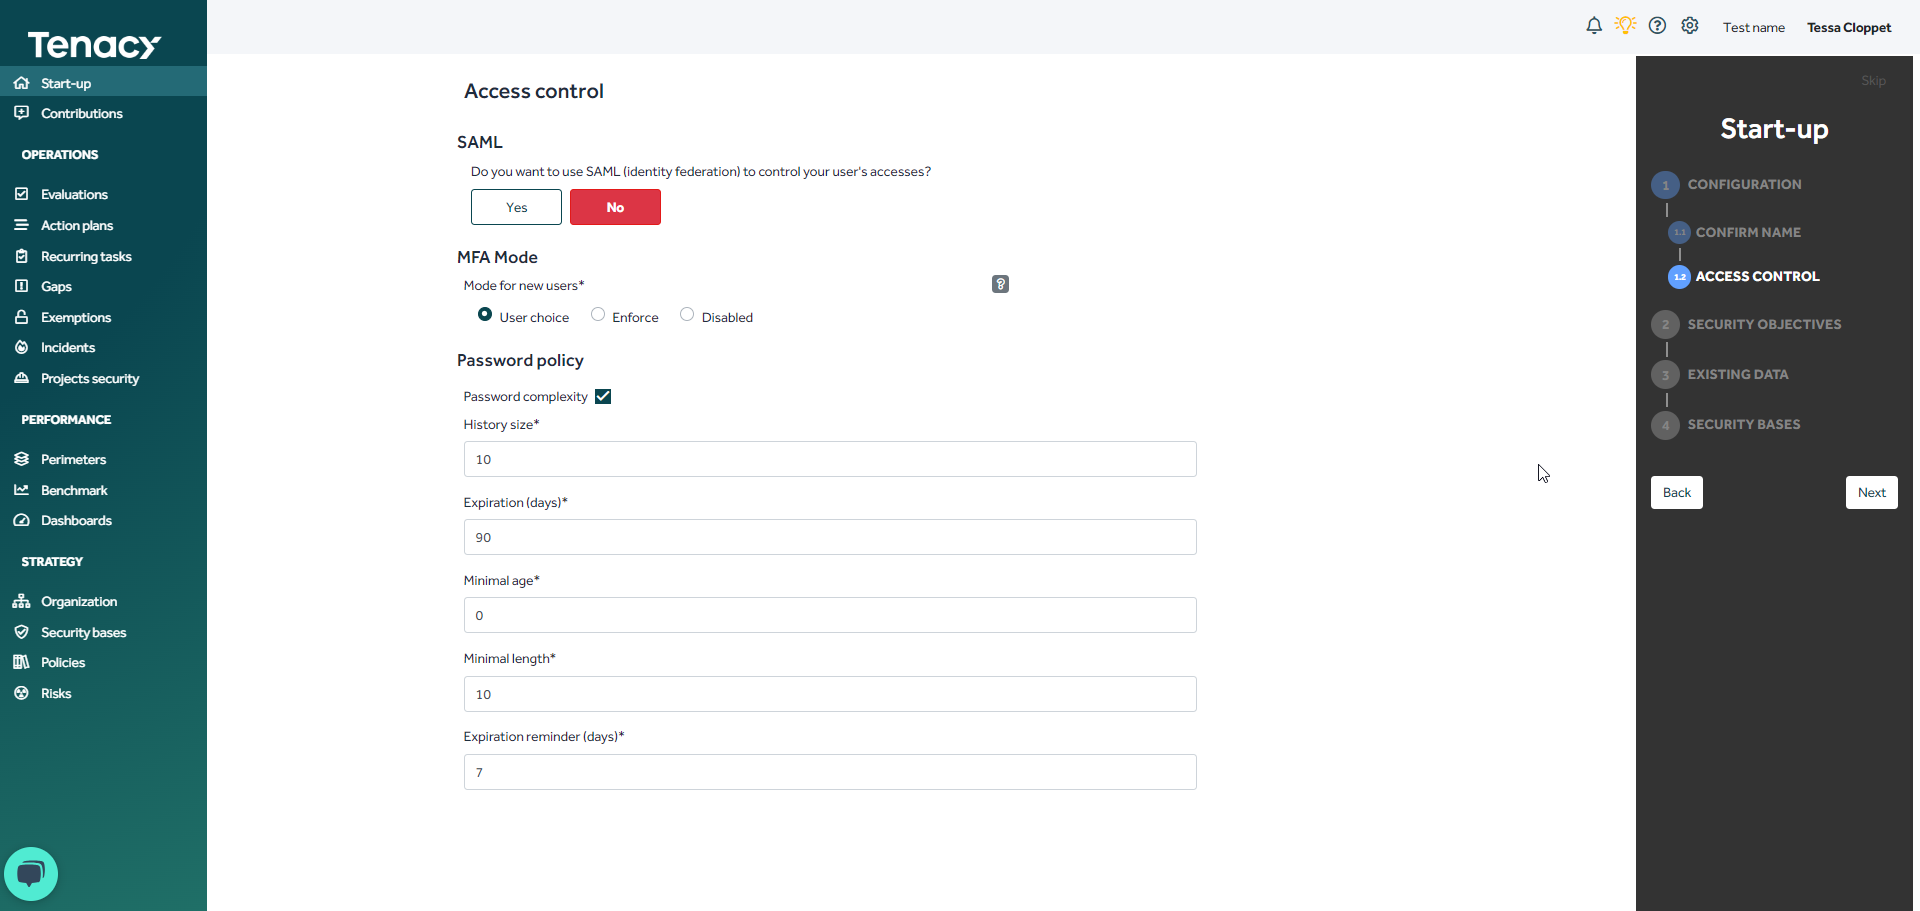
Here, the solution also allows you to edit your password policy.
2. Security objectives
2.1. Activity / 2.2. Regulations / 2.3. Certifications
Here you can select the security policies, regulations and certifications that interest you and with which you work or will work.
Don't panic if you don't find the ones that interest you right away, you will surely find them in our catalog later.
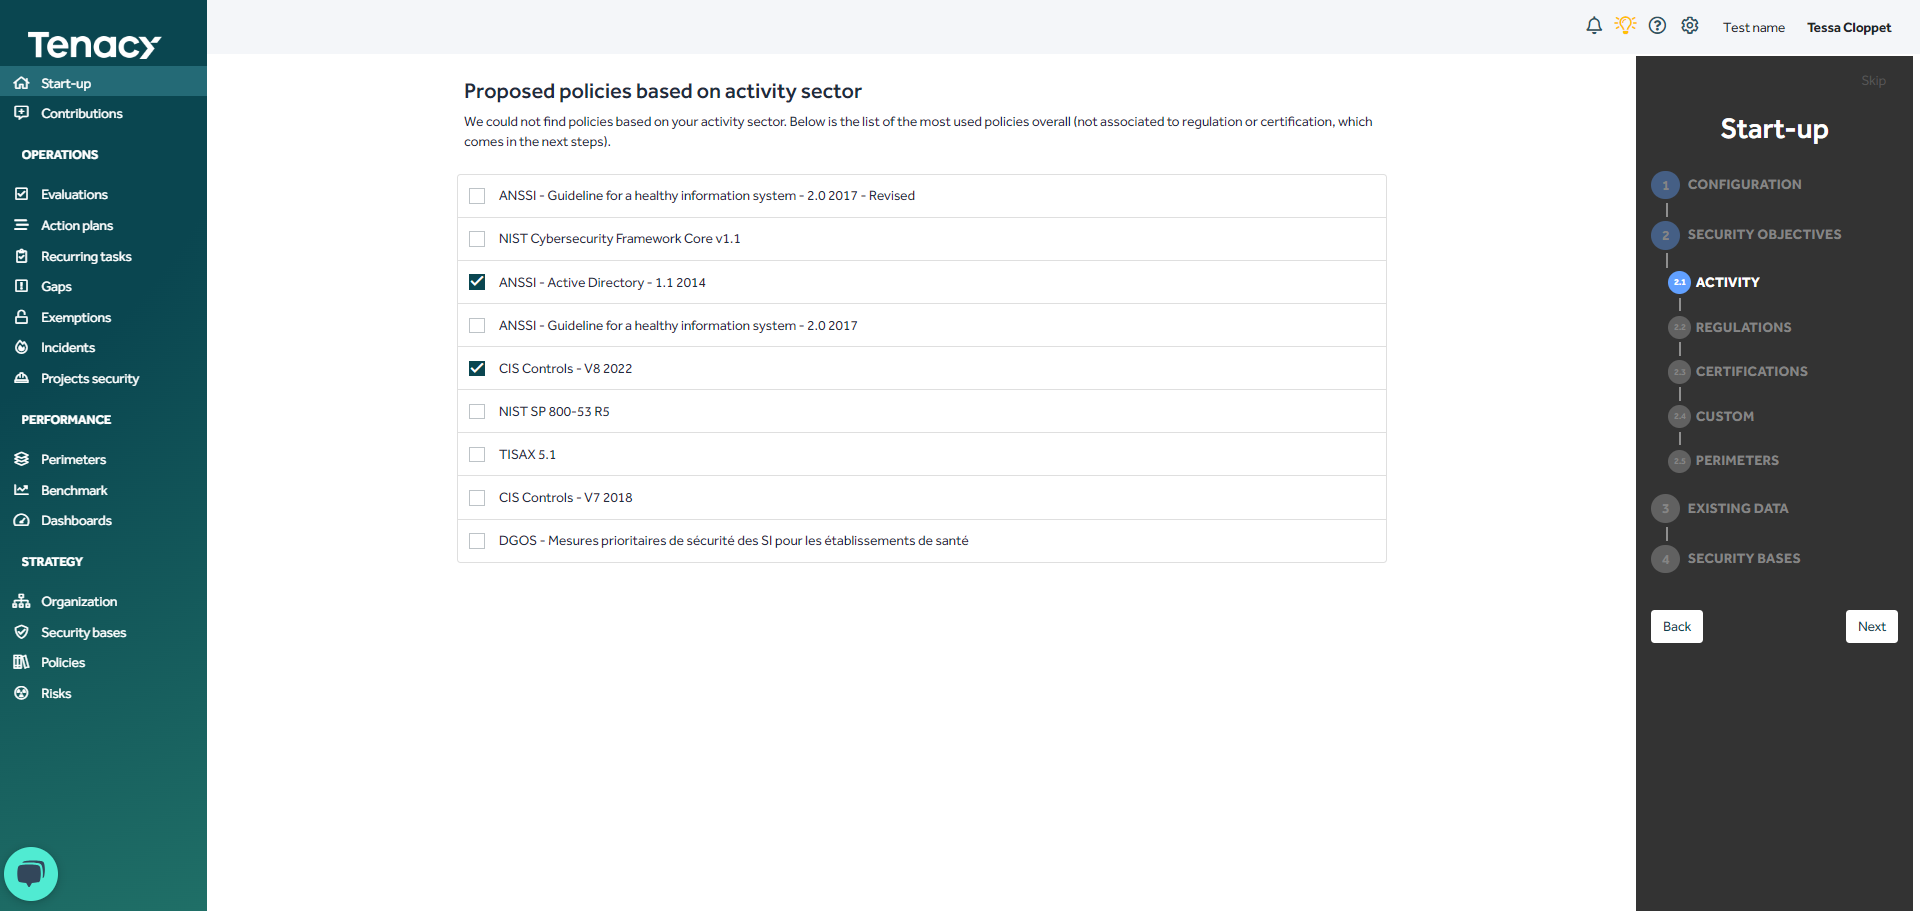
🔎 If the policy you are interested in doesn't exist in Tenacy, don't hesitate to contact support to discuss integrating this policy into the catalog.
💡This training workshop will help you better understand these policy steps.
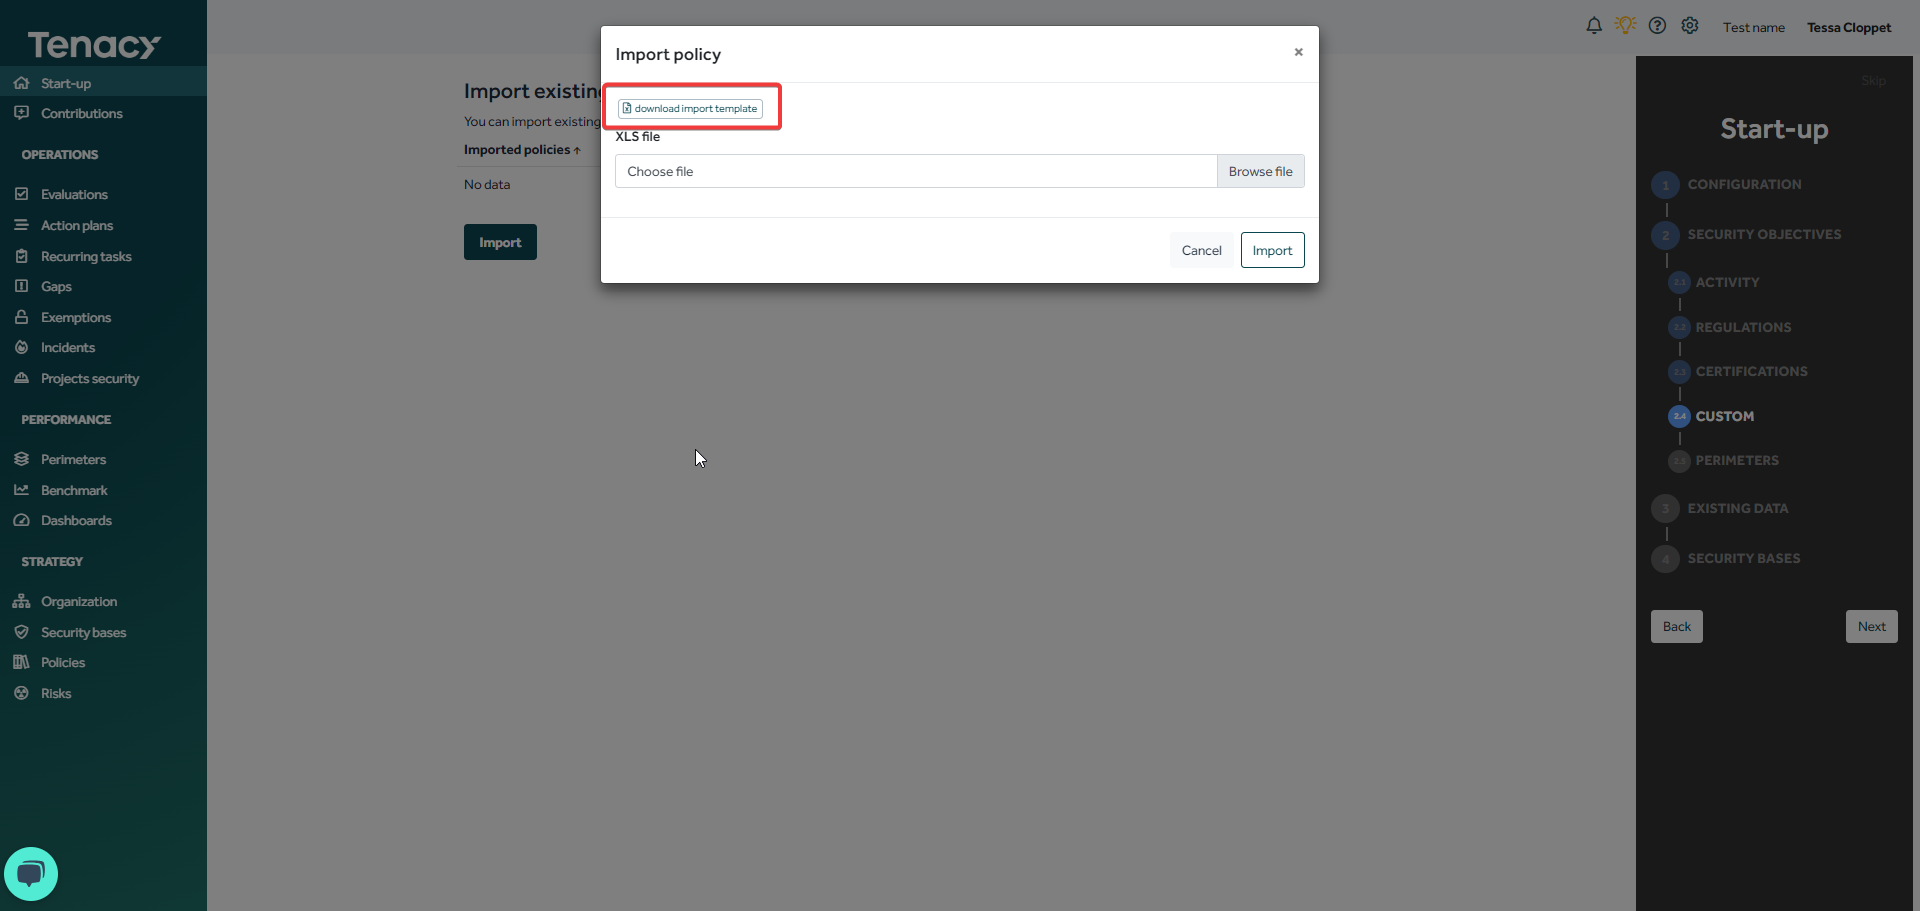
2.4. Custom
Here you can import your PSSI or any other policy, internal regulations to your organization.
⚠️ Remember to download the import template to be able to edit your Excel in the right format to import it into the solution.
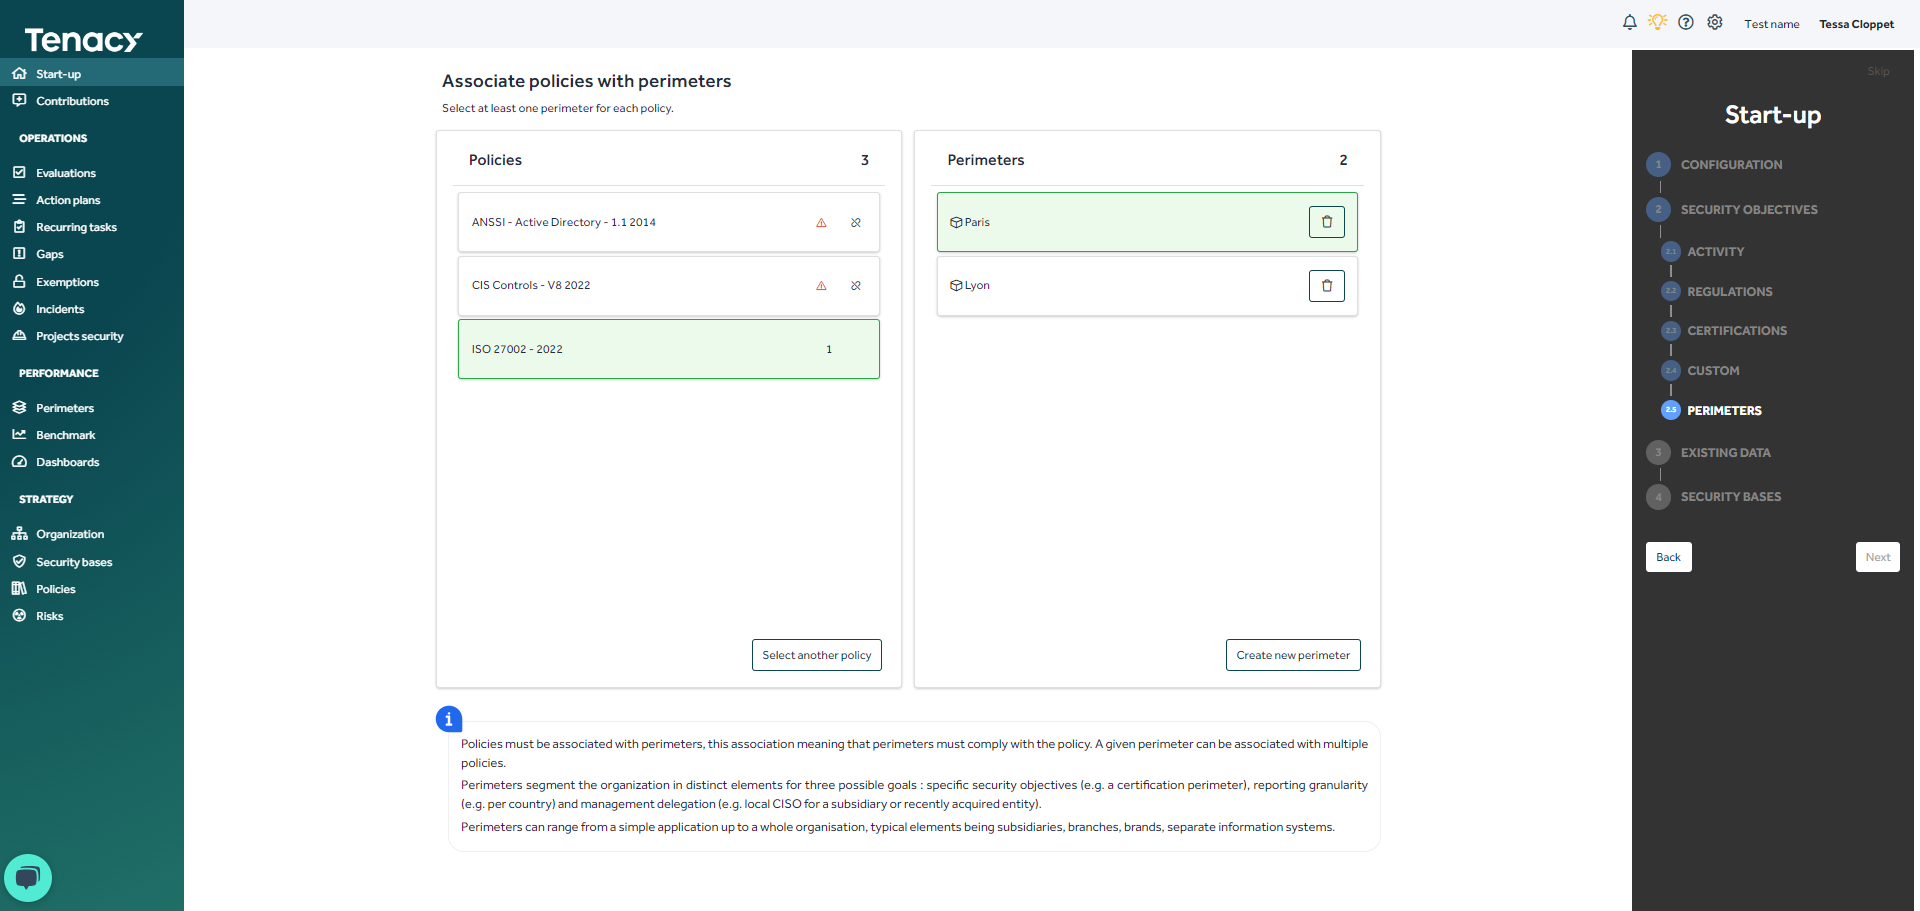
2.5. Perimeters
Policies must be associated with scopes. Perimeters segment the organization into distinct elements. Several divisions can be considered. If you don't yet know how to segment your organization, you can refer to this article.
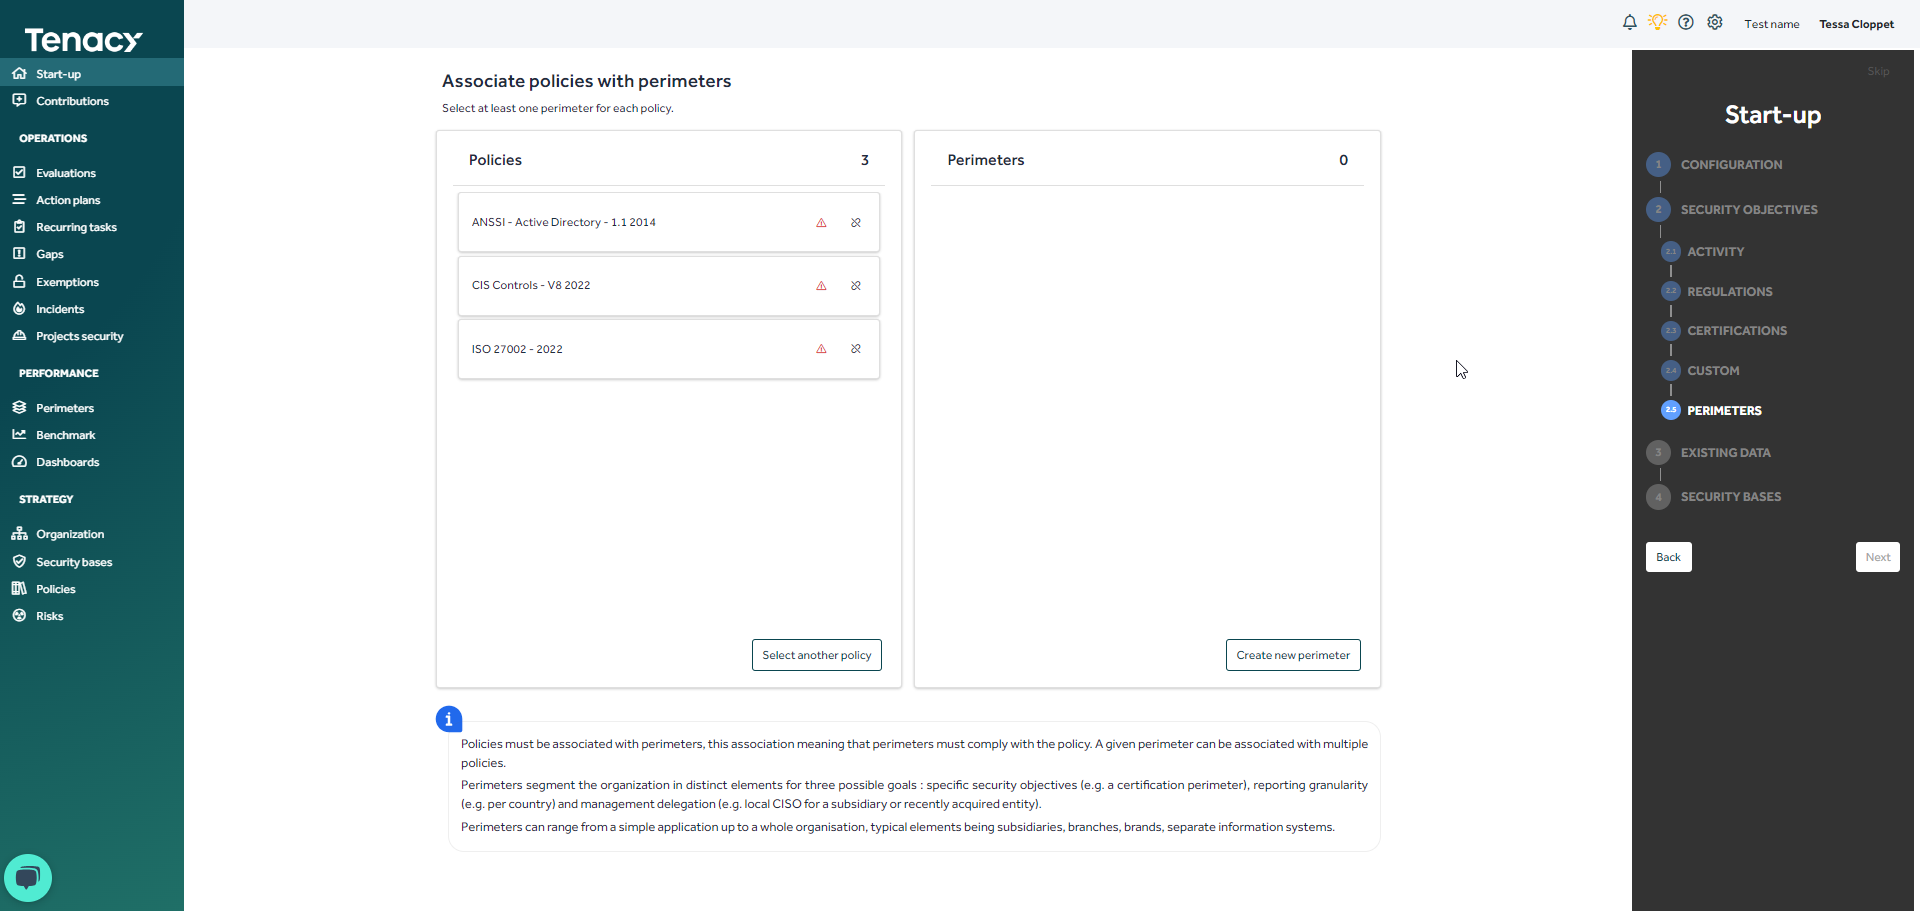

💡To associate perimeters with policies: click on the policy of your choice and click on the perimeters to associate. All policies must be associated with perimeters to move on to the next step.

3. Existing data
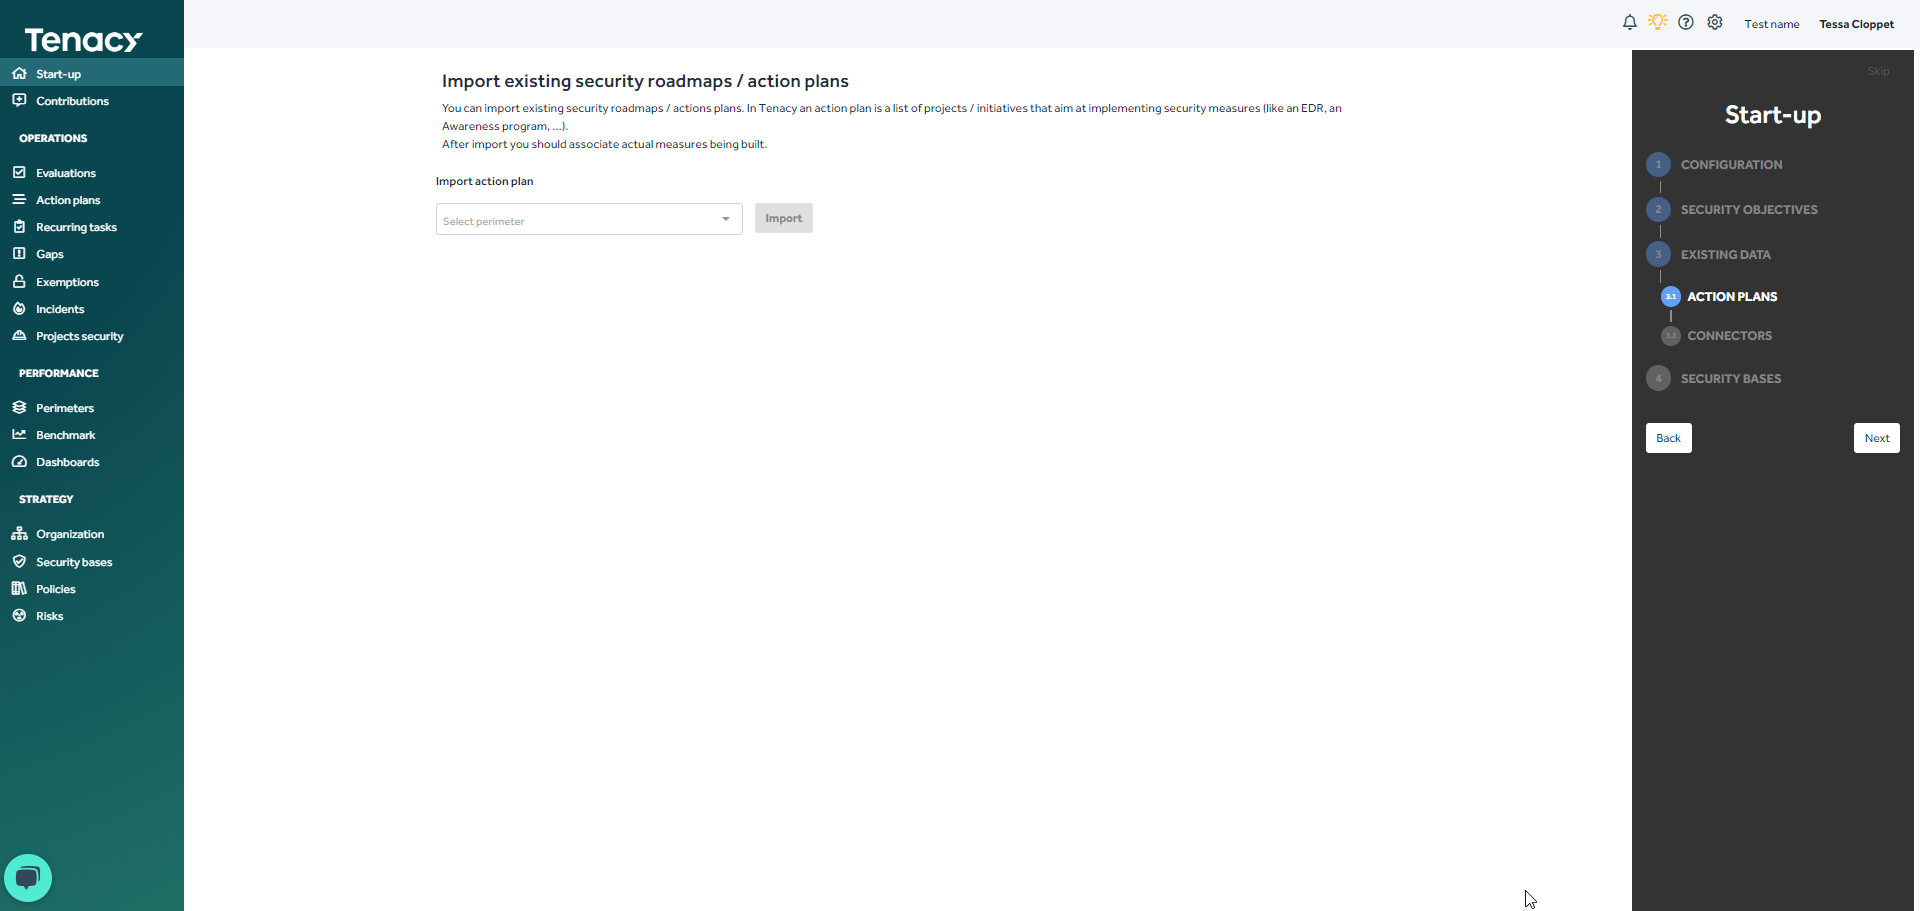
3.1. Action plans
You can import your action plans at this step. By clicking on "Import", you will be able to download the import template.
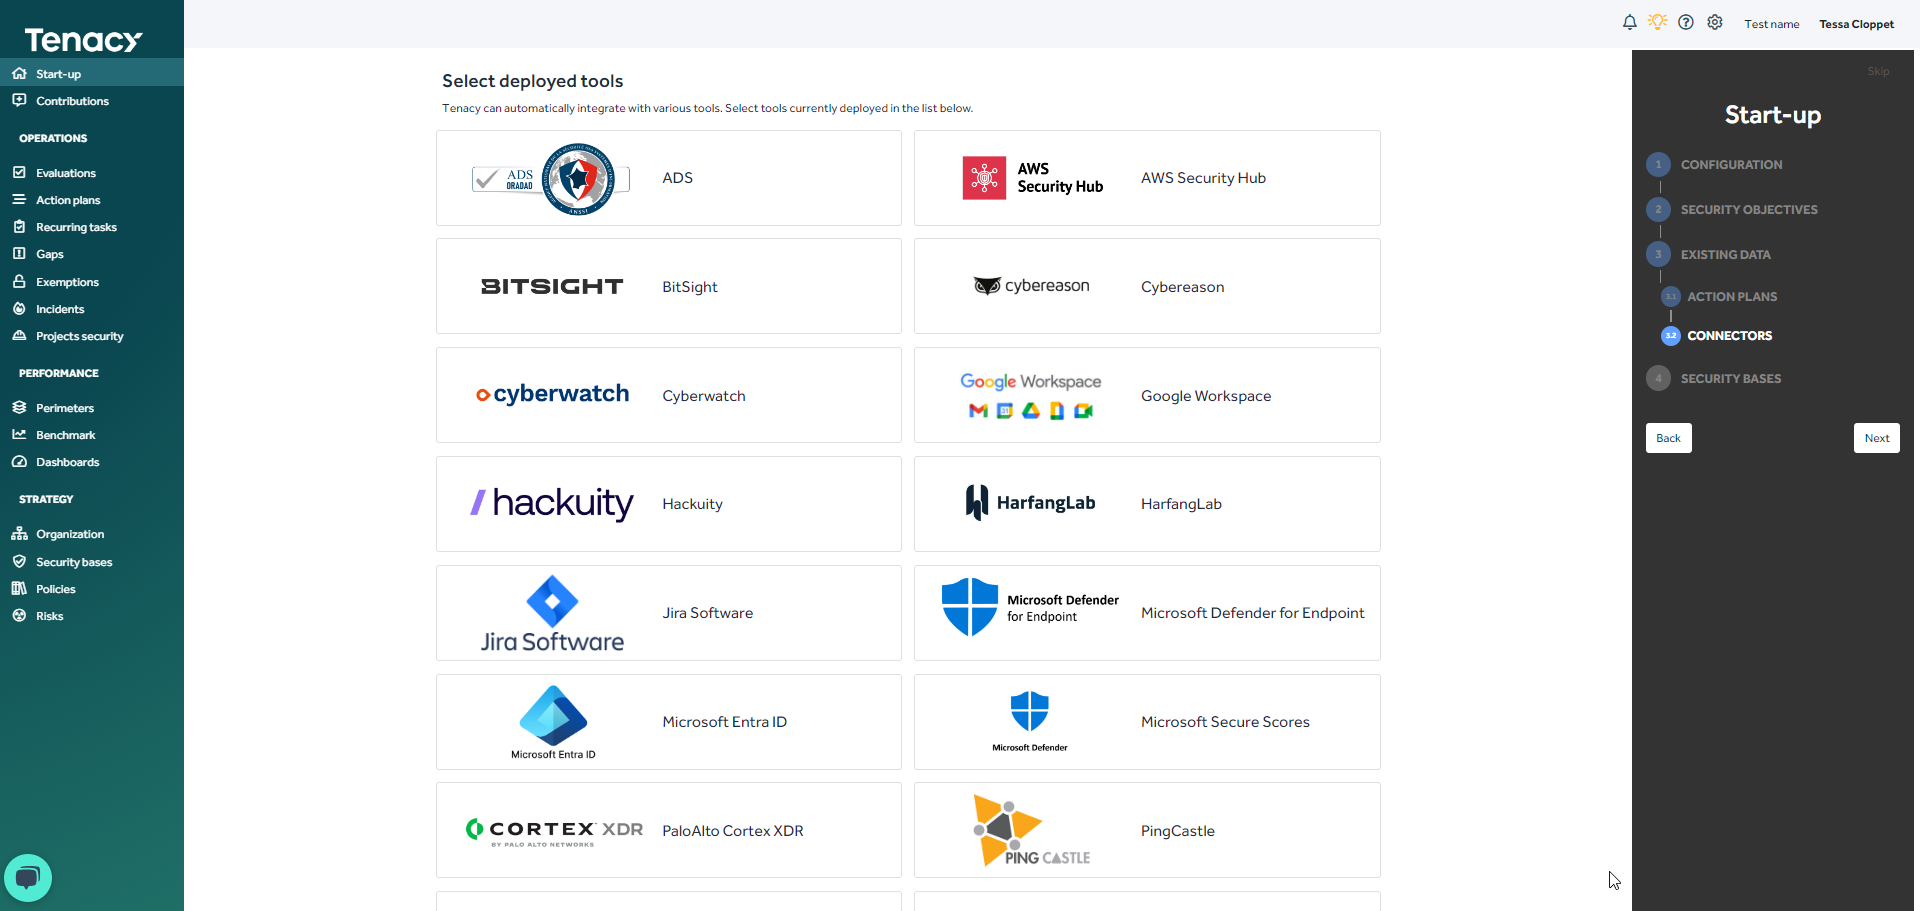
3.2. Connectors
If your license allows it, you can select the connectors that interest you here. These connectors will help you feed information (metrics, vulnerabilities) into the platform automatically.
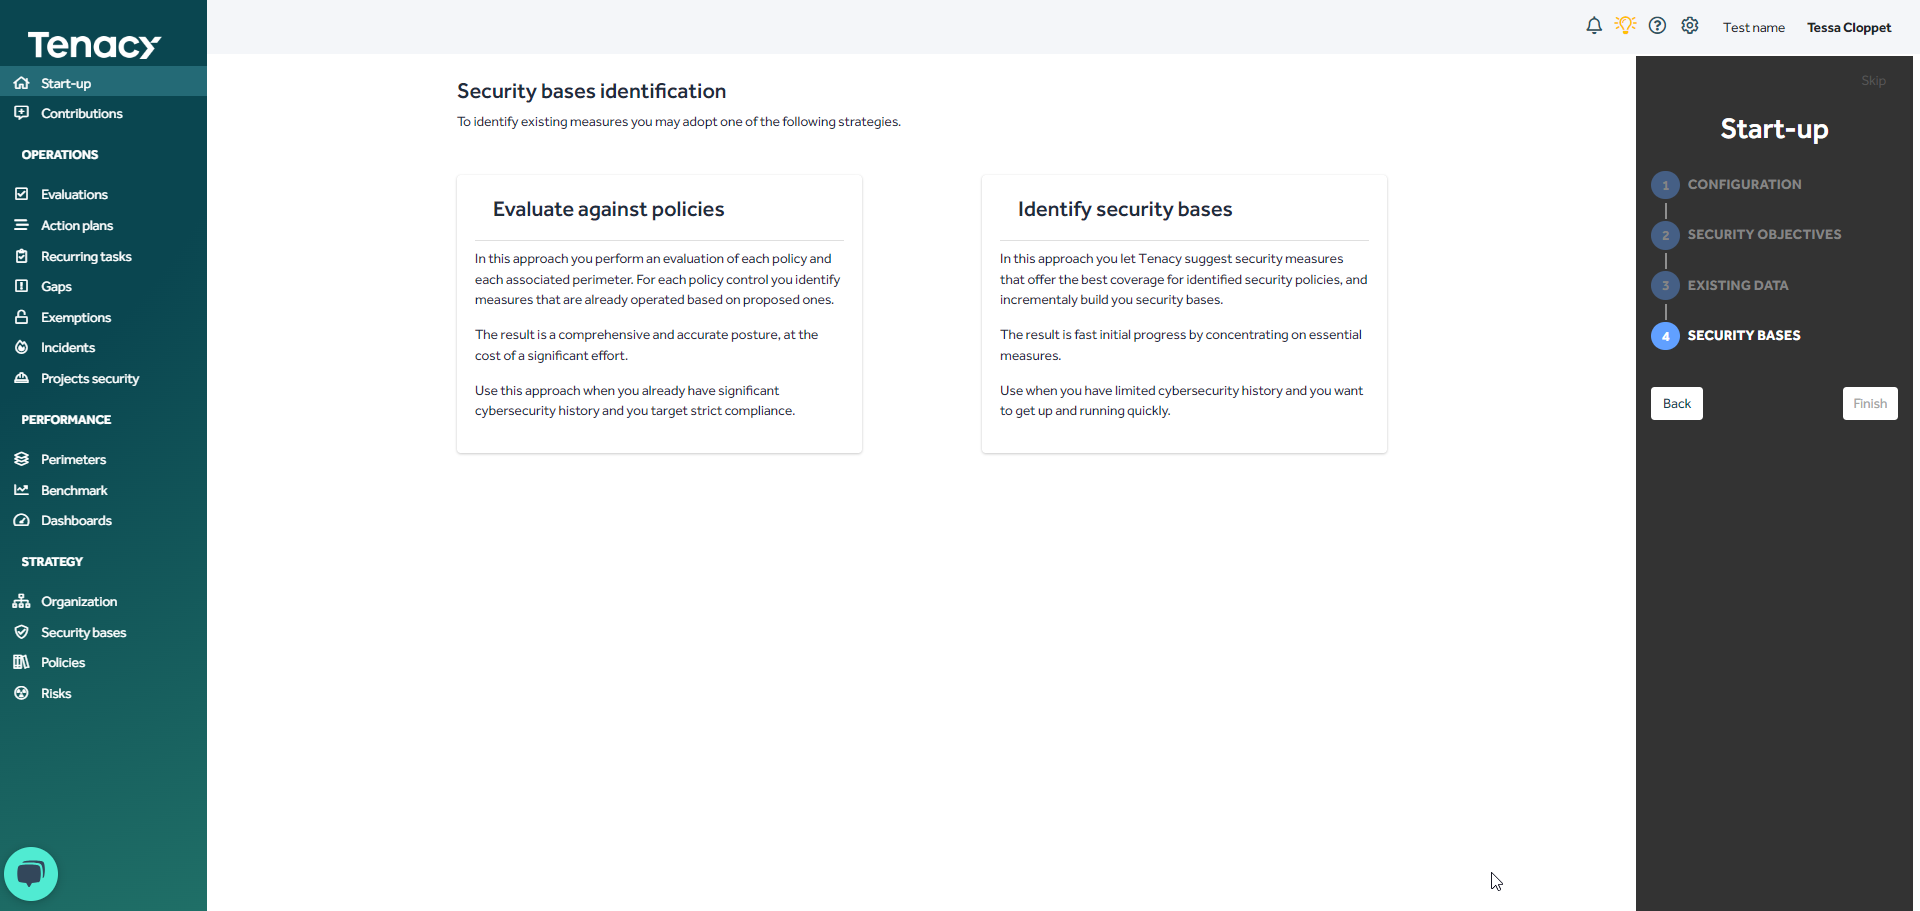
4. Security base
At this stage, you can begin work on your security bases.
💡To learn more about this, you can refer to this article presenting the functional model of Tenacy.
You have 2 options to start:
1. Create an evaluation: you will be guided through this step, but if you want more information, this article details the procedure.
2. Build your base incrementally: Tenacy presents you measures, it's up to you to validate whether or not they are present in your organization.
After all these steps, you have completed your Wizard start-up, you are ready to work in Tenacy! 😁