You need to verify and measure the application of a security control, here's how to set up a control plan (or monitoring plan).
Summary
1. Introduction: basic concepts and theory
1.1. Basic concepts
1.2. Theory
1.3. Modeling in Tenacy
2. Reporting about the controls
3. In practice how to create a new control?
3.1. Identify the measure
3.2. Create the recurring task
3.3. Other elements of a recurring task
3.4. Update the dashboard
1. Introduction: basic concepts and theory
1.1. Basic concepts
Measures
A measure is a software and/or process and/or team enabling a perimeter to be secured.
To carry out a control plan, the measure must be in run in Tenacy.
A running measure:
- Device currently in place on the perimeter
- Can be completed to validate the status by: improvement actions / recurring task
Recurring tasks
- Carrying out recurring tasks contributes to the performance of your measures
- 2 types of recurring tasks: operational (Ex: updating the AD following departure/arrival) and control (Ex: checking that all active AD accounts correspond to active employees)
🔎Recurring tasks can only be created on running measures.
⚠️ A measure can be controlled by several recurring tasks but 1 recurring task controls only 1 measure.
Metrics
- A metric can be attached to a Recurring Task.
- The metric is collected by the operator of the recurring task and can be seen as its result.
Users
The pilot creates the control and assigns it to another user (pilot or contributor).
1.2. Theory
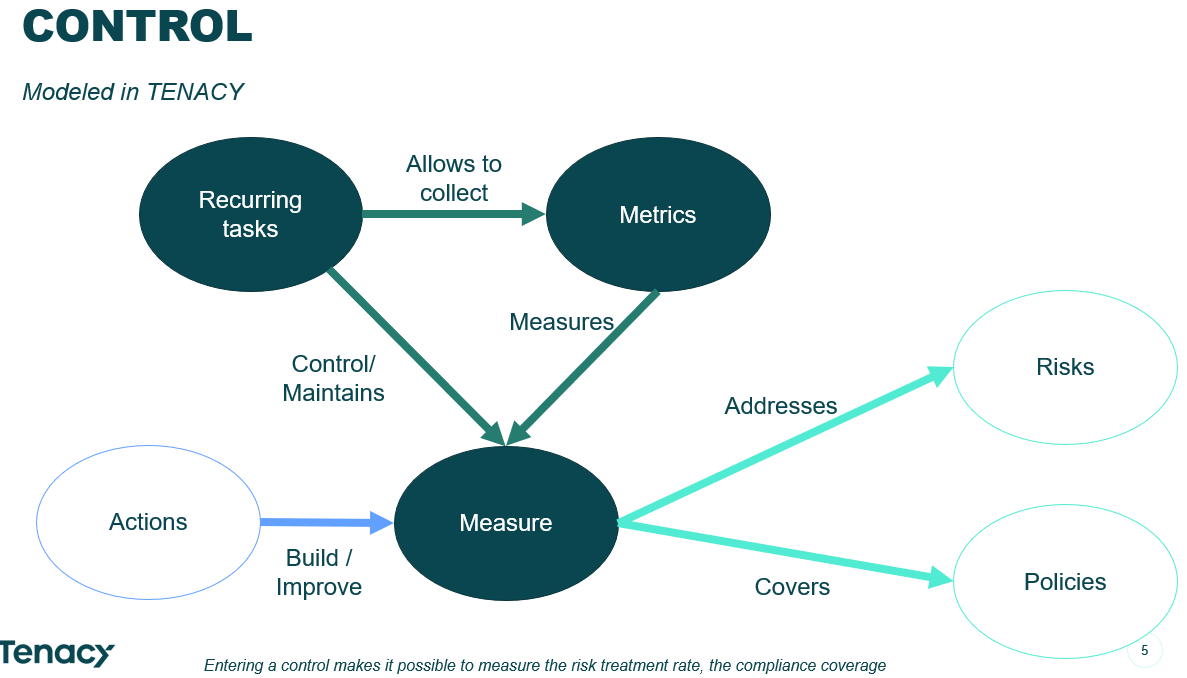
🔎 A control is a periodic verification to verify and measure the application of a security control.
➡️In Tenacy a recurring task allows you to collect metrics to measure the effectiveness of a measure.
Example :
the recurring task “Messaging compliance control” allows you to collect the “Number of domains monitored” metric to measure the effectiveness of the “Messaging Security” measure.
1.3. Modeling in Tenacy
2. Reporting about the controls
Each of the functions generates indicators:
- Recurring task:
➡️ Completion rate (and approval if necessary) of a task
➡️ Completion rate of a group of tasks
➡️ Rate of recurring “control” type tasks completed successfully - Metrics:
➡️ Customizable formulas (+ - * /, number of days etc.)
➡️ Indicator with history (fixed frequency)
➡️ Activities and performance indicator - Measures:
➡️Measure performance
TR achievement rate x Achievement of performance indicator objectives
These indicators can be represented in a dashboard.
3. In practice how to create a new control?
For each measure it will be necessary to identify the possible verification actions and find their frequency and then create the recurring tasks and registers necessary for this reporting.
3.1. Identify the measure
Identify the measure and the perimeter to be controlled. If it is not already in run on your environment, instantiate the measure.
From the catalog
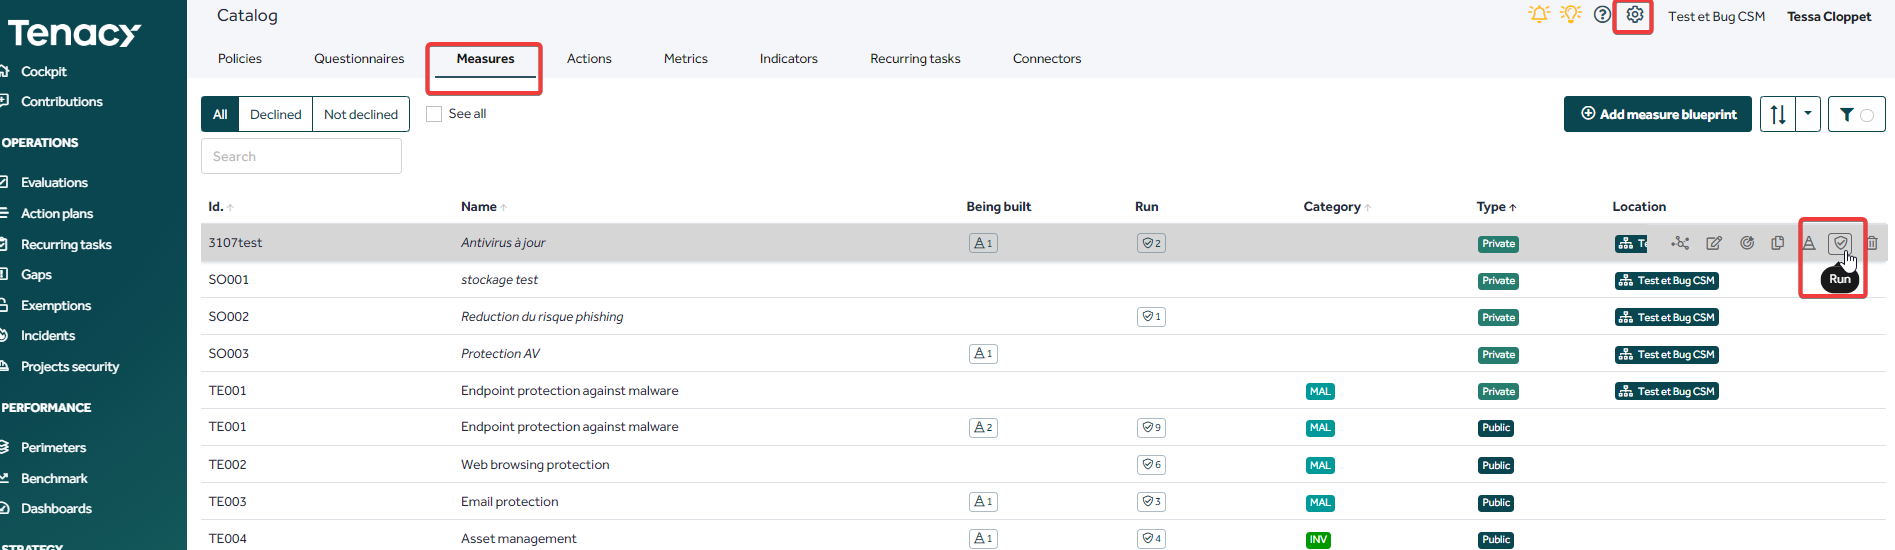
or the security base. 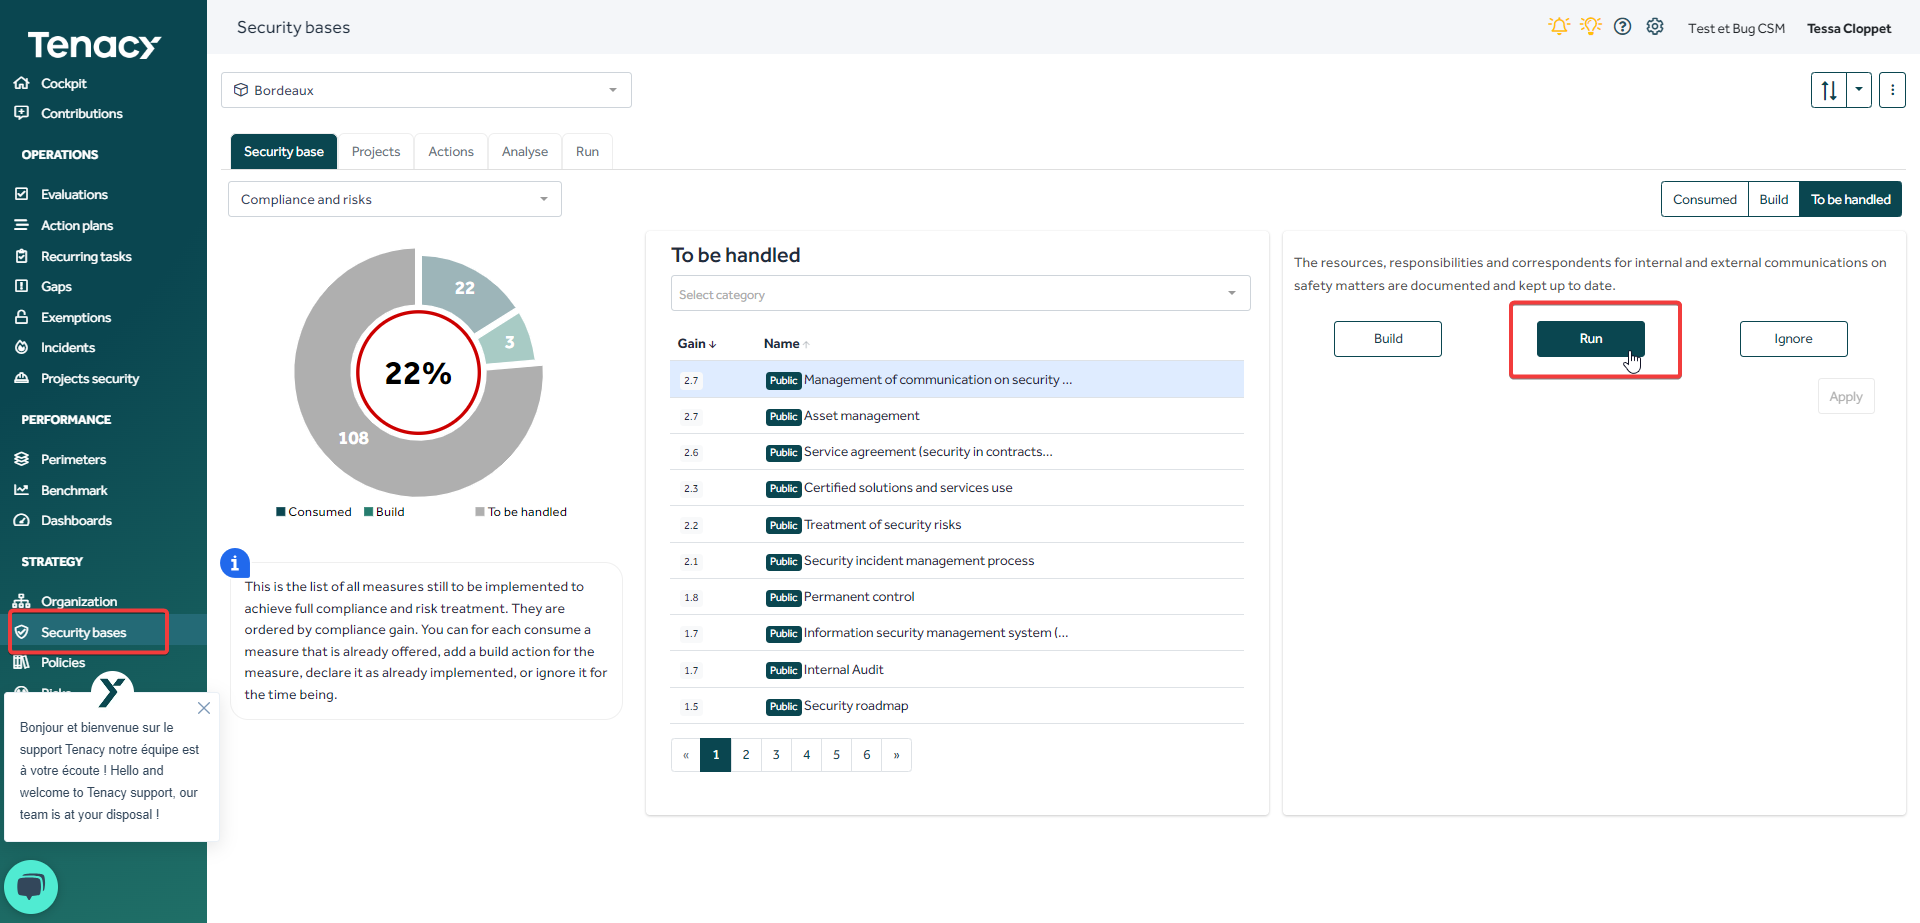
3.2. Create the recurring task
Create the recurring control task and associate it with the measure.
Recurring tasks > “Add recurring task” button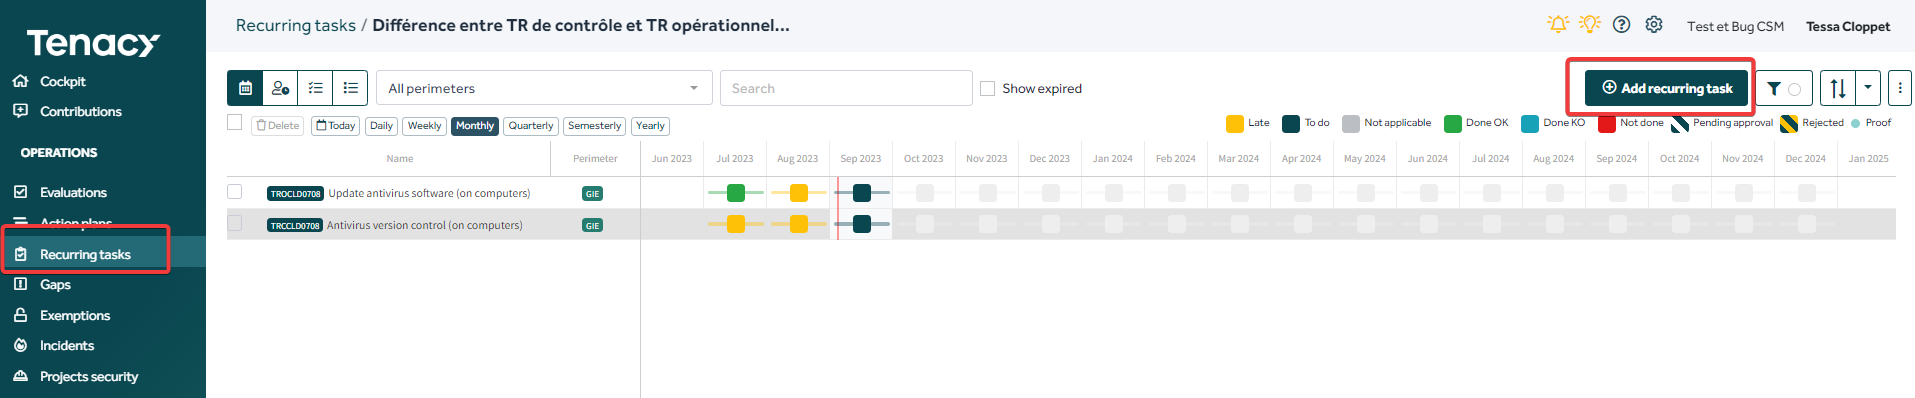

Parameters to fill:
- Name: Control Title
- Measure identified to control the security control
- Periodicity: target frequency
- Identifier: not required, if you leave empty the solution will automatically generate an ID
- Workload: estimation in days of the workload for carrying out the occurrence of the control
- Manager: user / group in charge of entry
- Approver: user/group in charge of validation
- Start: start of the control period
- End: optional - allows you to define until when the check must be carried out
- Proof attachment required: allows you to activate the entry of proof (link/document) when entering a control.
- Execution window: optional - number of days before the end of the period in which it is possible to enter the task.
- Allow NA: Allows a contributor to register a control as N/A.
- Labels: optional - tags, allows filtering.
- Nature: Tenacy makes it possible to differentiate a recurring operational task from a recurring control task.
🔎 A recurring control task allows 3 entry options:
![]()
Done OK: the RT has been done and the result is as expected
Done KO: the RT has been done but the result is not as expected
Not done: the RT has not been carried out
Vs.
An operational recurring task allows 2 entry options:
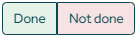
Done: TR is done
Not done: TR is not carried out
3.3. Other elements of a recurring task

History tab: here you can enter the achievement (or not) or consult the history of the task. You can then:
- specify the task performer
- choose whether the task has been completed or not
- specify the date of completion
- add a comment
- attach a file or link for evidence or information (e.g. a list of deleted accounts).
Metrics:
Once the recurring task is created, you can link the recurring task to one or more metrics that you want to collect.
Although not mandatory, this allows you to enter data for each recurring task performed.
Metrics entry will be requested when the recurring task is marked as "Done".
💡This article on How to attach a metric to a Recurring task shows you the different ways you can do the manipulation.
Files: here you can attach procedures and templates. The tab can be viewed by the manager of the task.
Activity: You can log notes and discuss the task from this Activity tab.
3.4. Update the dashboard
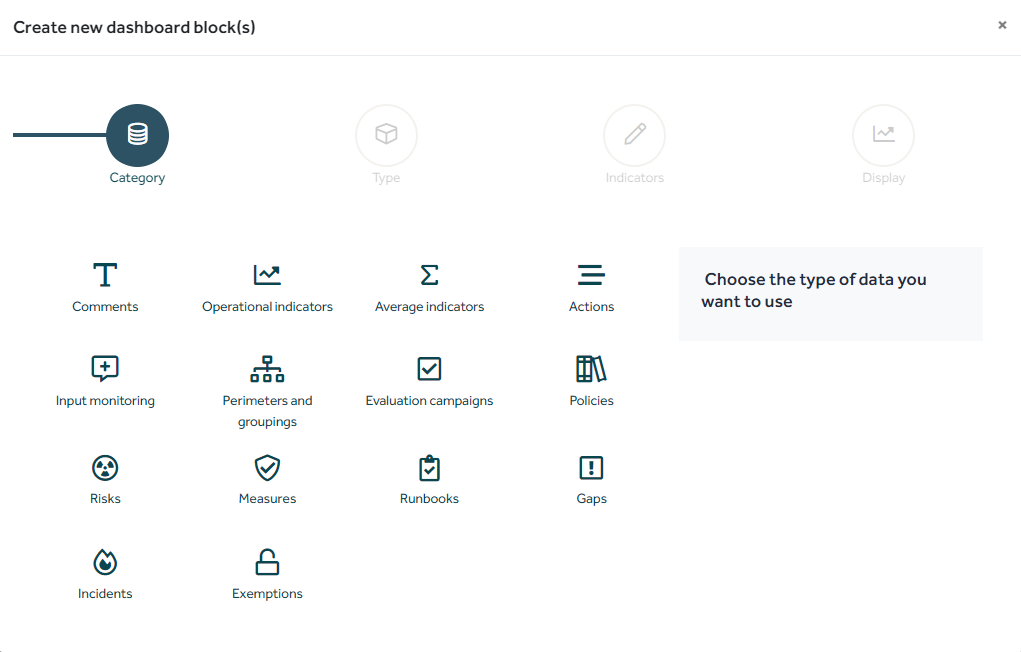
Once your controls are created and organized (creation of groups and registers) select your blocks in your dashboard.
Additionally, if you use controls to collect metrics, you can report on these new indicators.