Recurring tasks are actions to achieved with a determined frequency. You can associate metrics to it in order to enter data on a regular basis when carrying out your recurring tasks.
Summary
1. Associate proposed metrics with a recurring task
2. Manually associate metrics to a recurring task
3. Create and associate metrics to a recurring task
4. Do a test
1. Associate proposed metrics with a recurring task
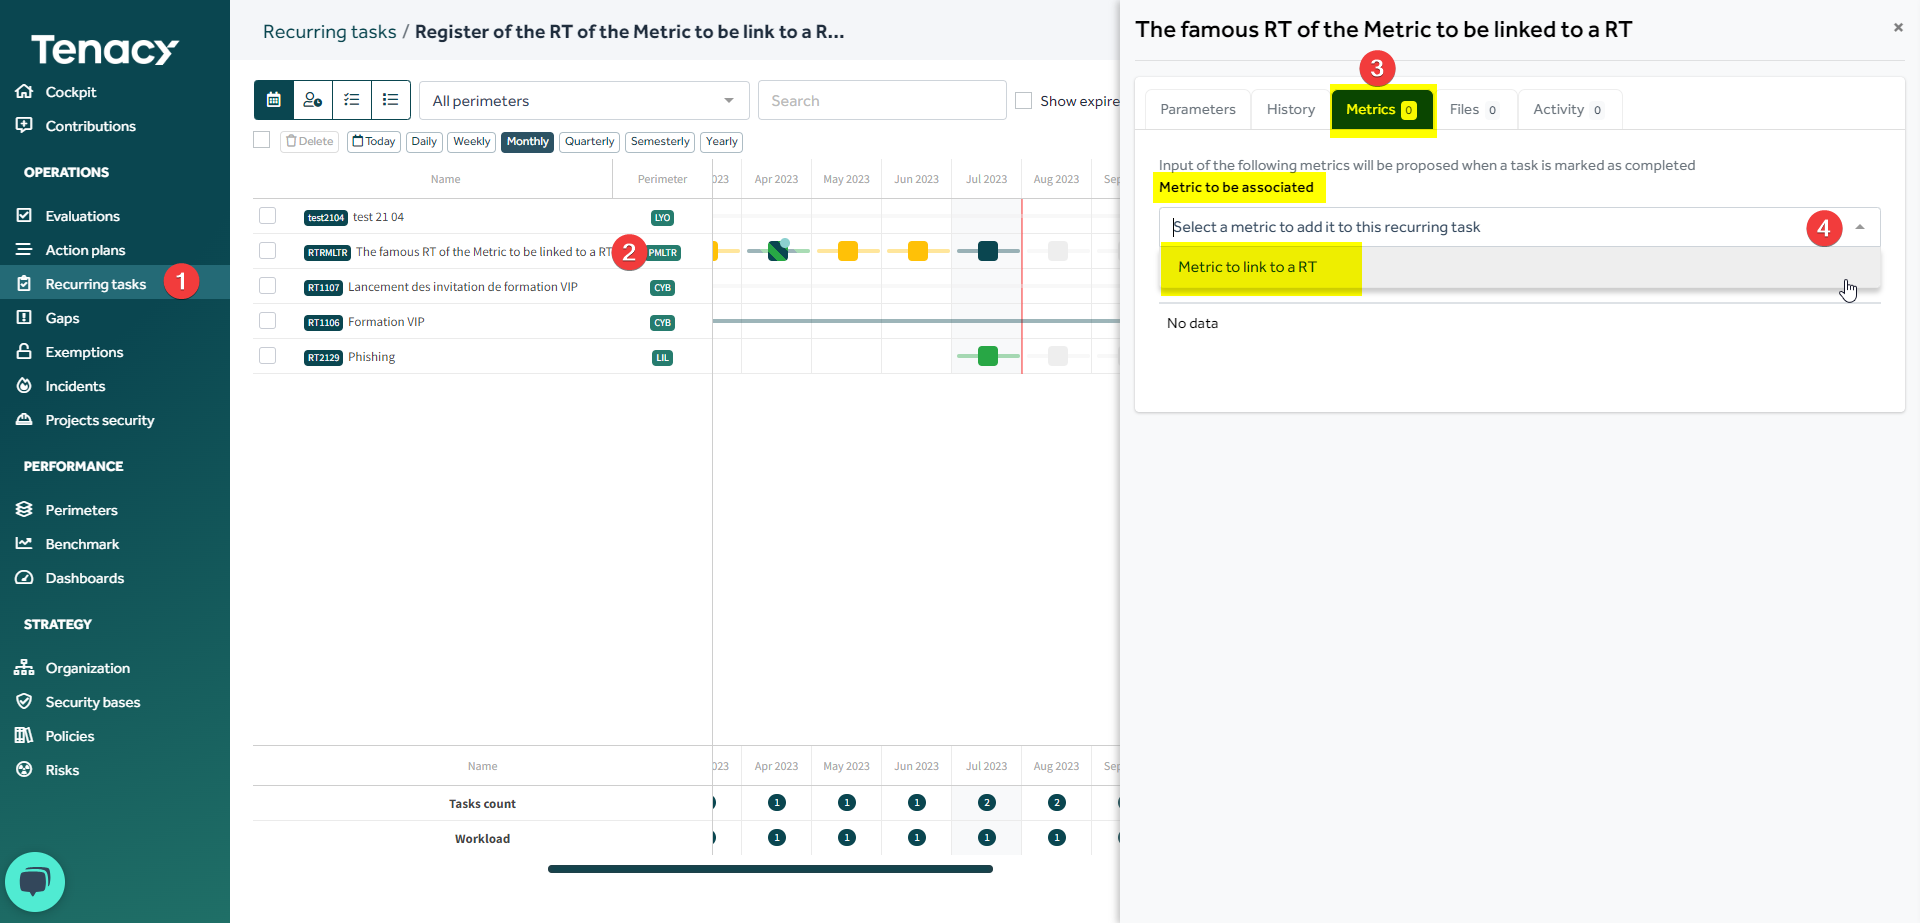
In your ![]() "Recurring tasks" tab, click on a RT then on the "Metrics" tab.
"Recurring tasks" tab, click on a RT then on the "Metrics" tab.
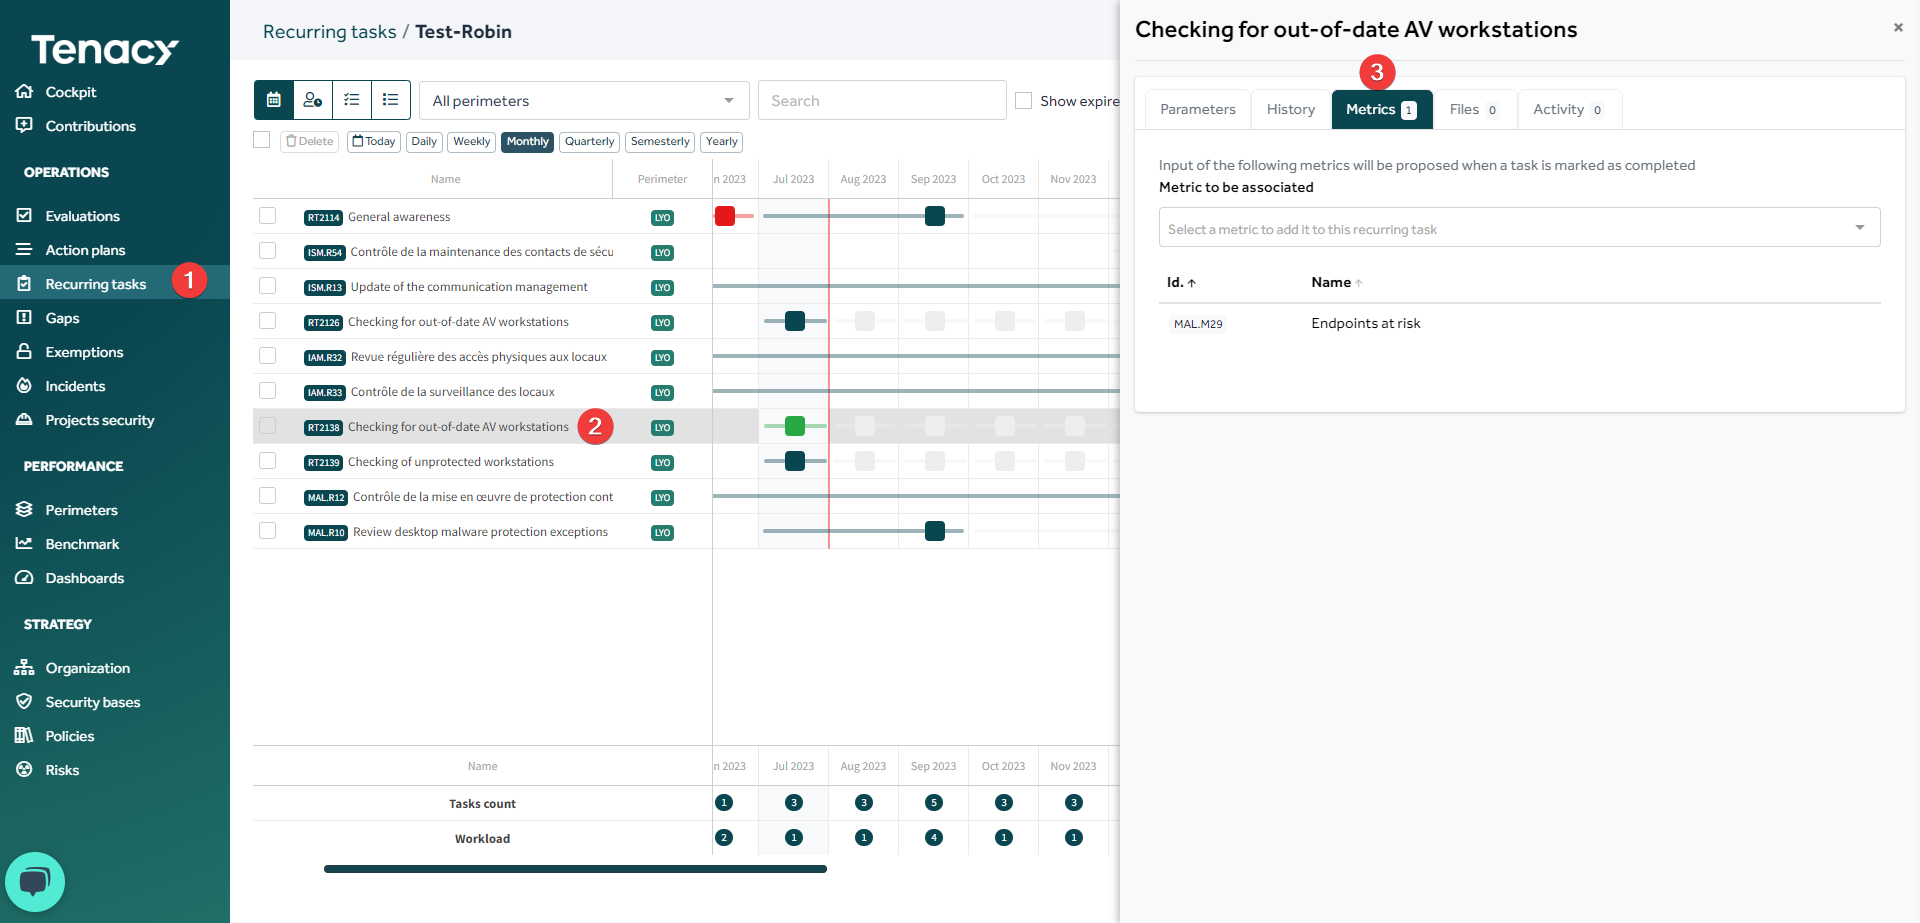
Under "Metric to be associated" you will have access to proposed metrics.
🔎 These metrics are themselves from indicators which are attached to the same measures as your recurring task.
For some recurring tasks, in the "Metrics" tab, it is possible that no metrics are being proposed to you.
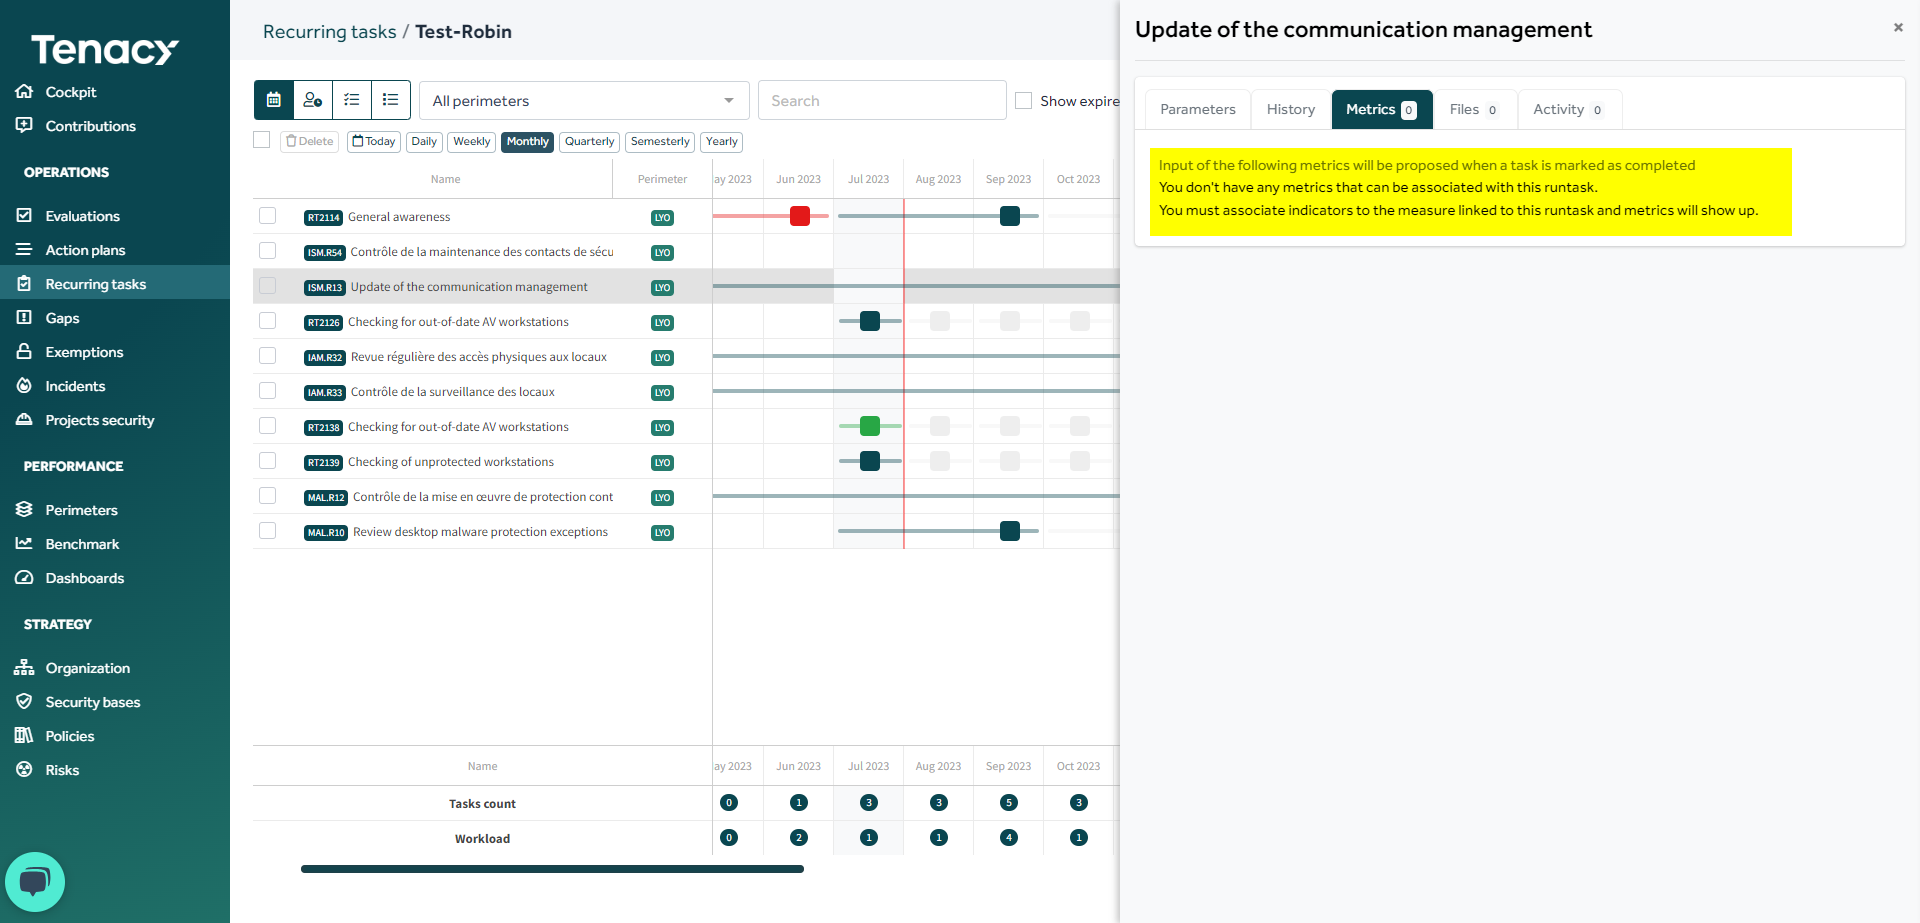
As you can see, it is necessary to associate, in advance, the indicators (and therefore the metrics) to the measures that the recurring task will control.
2. Manually associate metrics to a recurring task
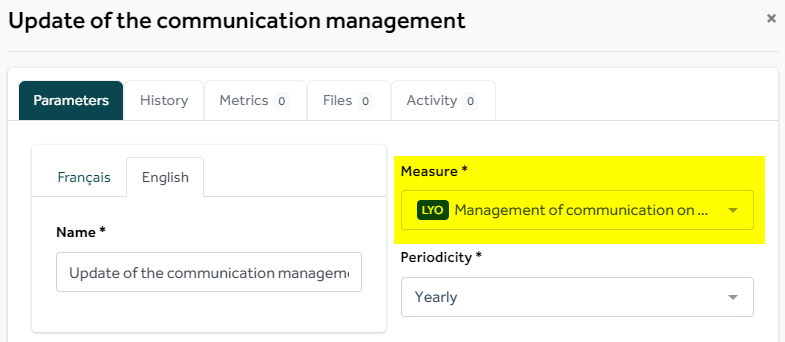
It is first necessary to identify the measure and perimeter on which you will have to add indicators.
All you have to do is go in the recurring task's parameters:
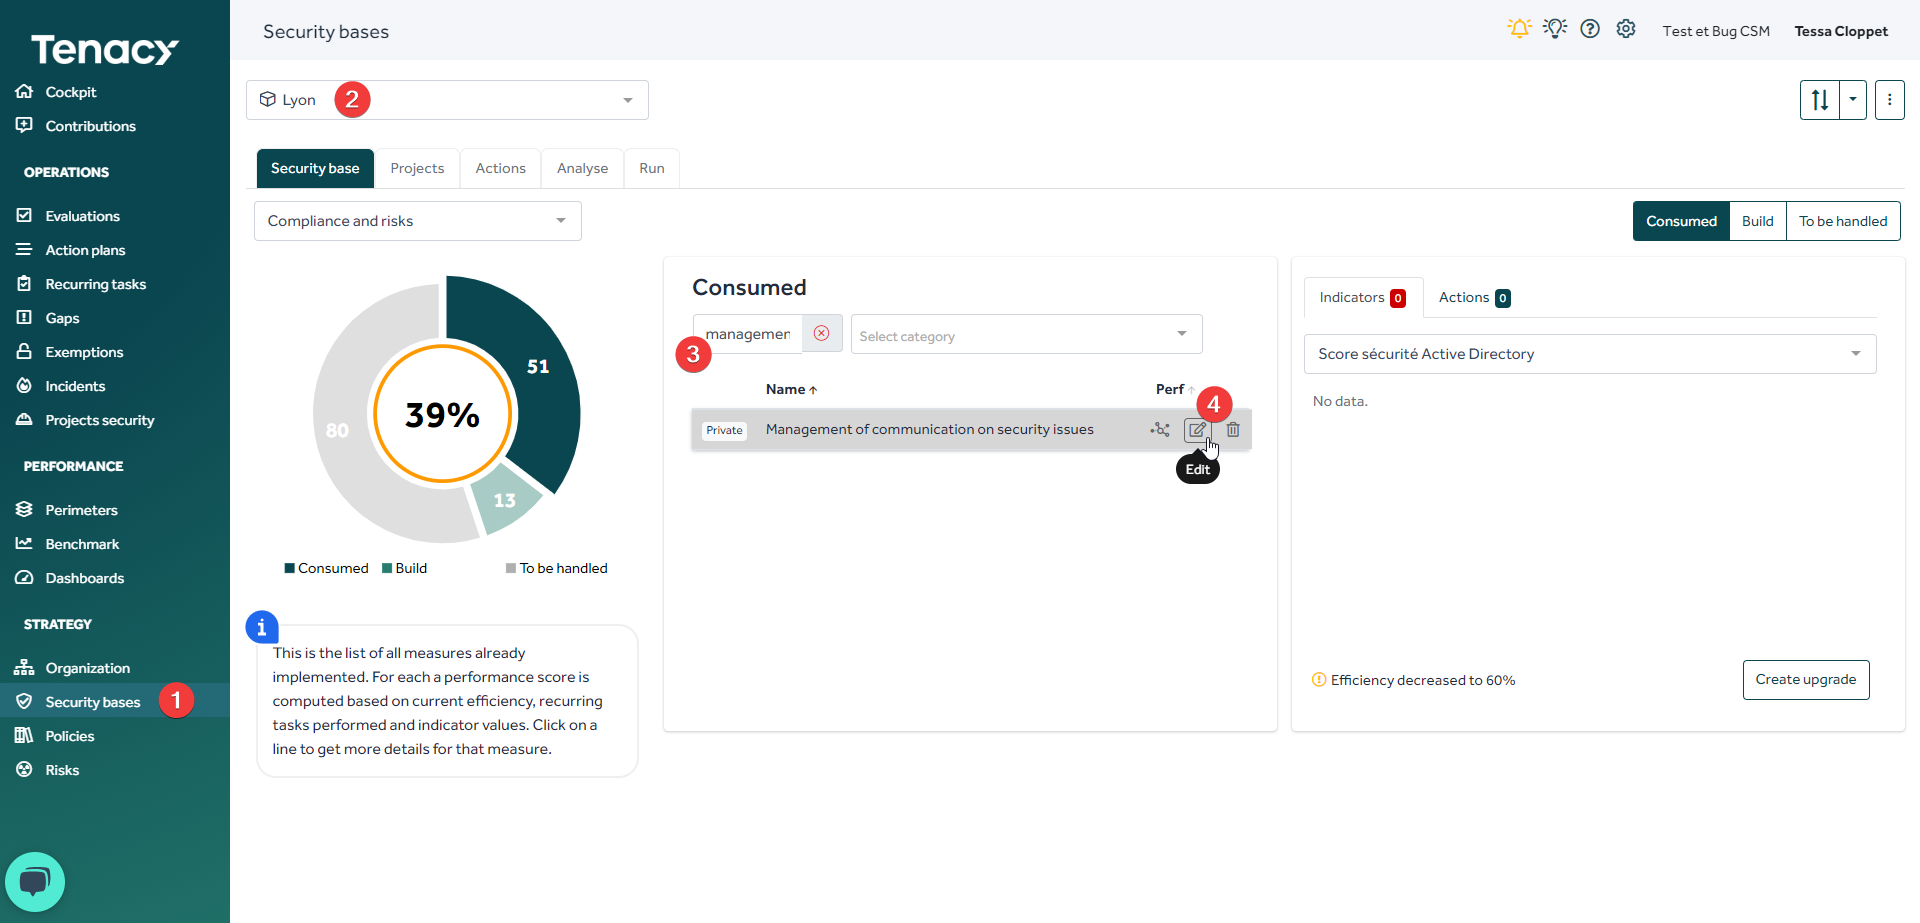
Then, go to your ![]() Security bases on the left bar of your screen.
Security bases on the left bar of your screen.
Select the perimeter on which the measure is operated then search for the name of the measure. Finally click on the "Edit" icon.
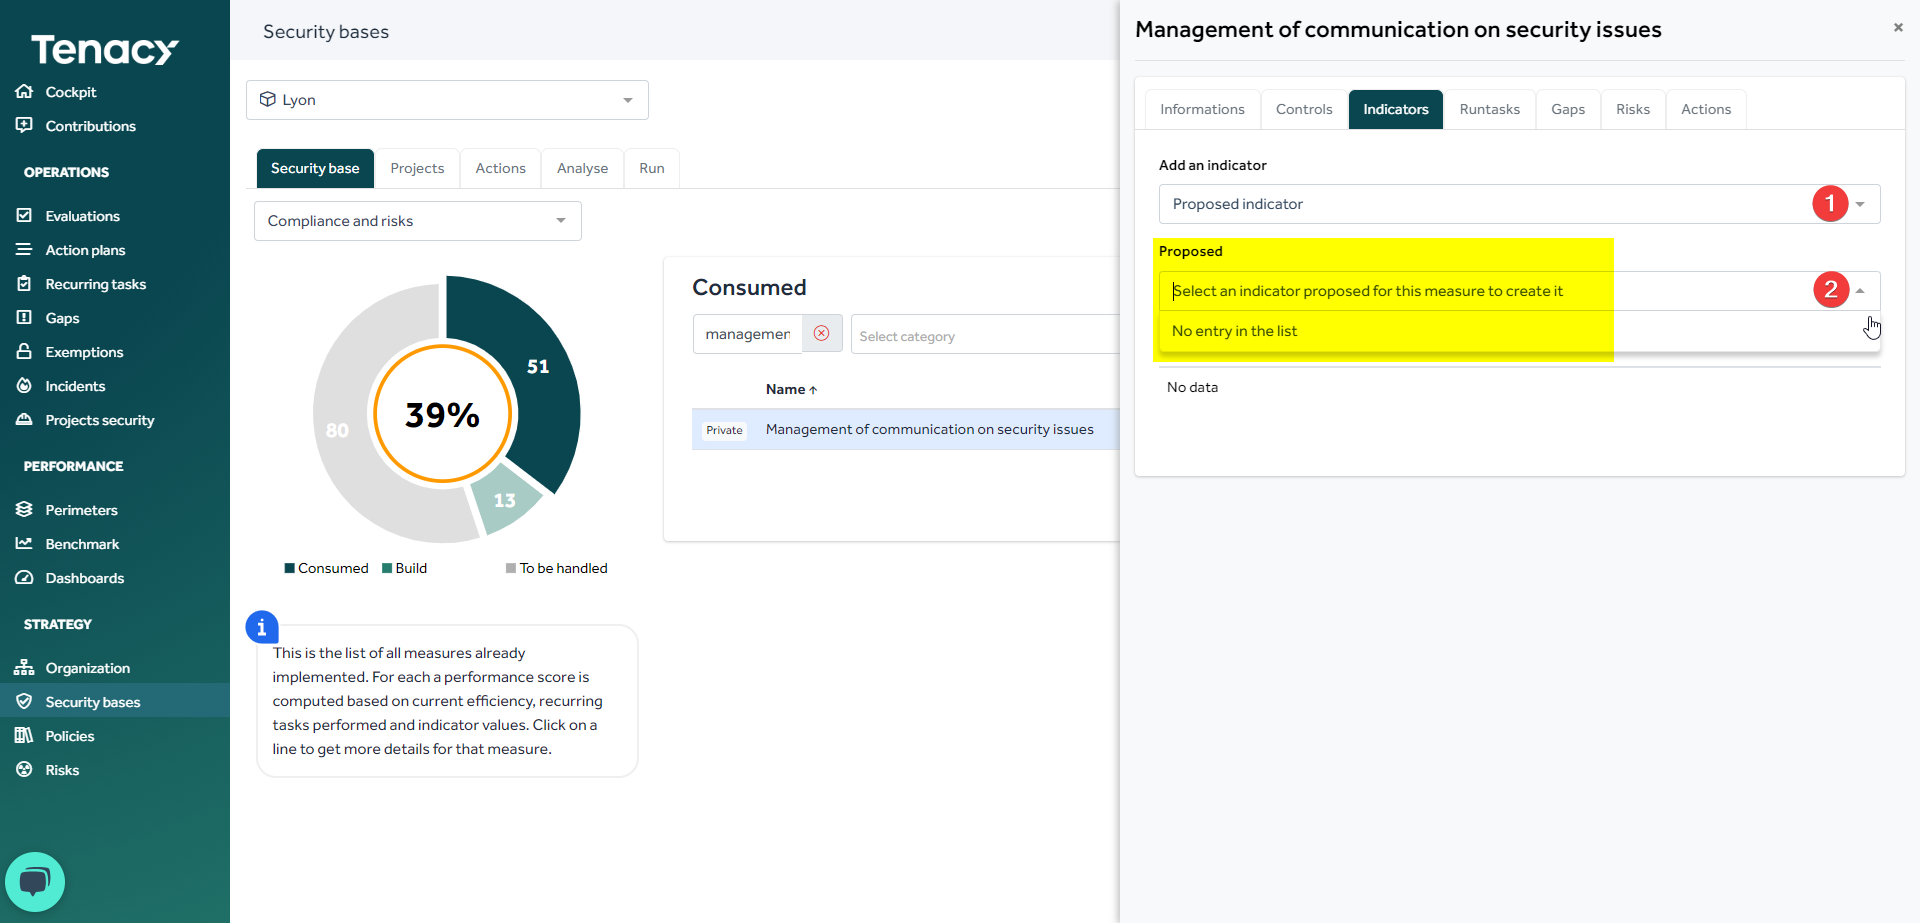
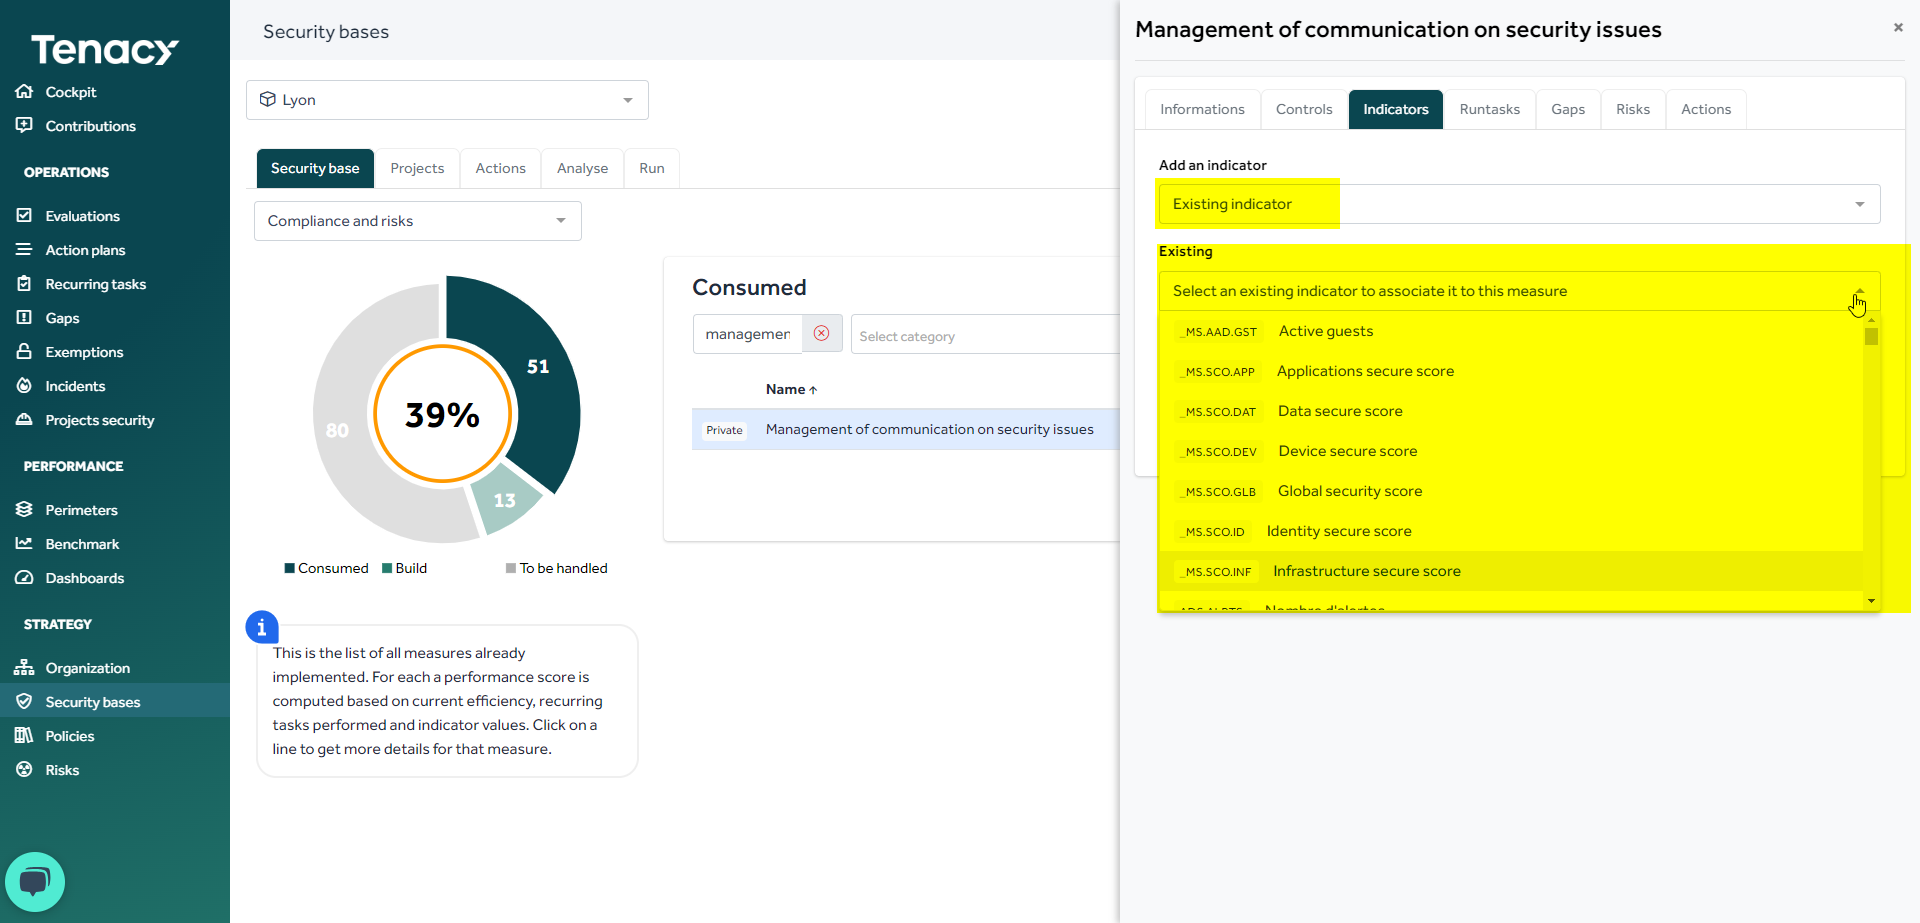
In the "Indicators" tab, the solution suggests you add "Proposed indicators" or "Existing indicators".

In the "Proposed indicators" you will find the indicators that the Tenacy teams have linked to the measure.
However, it is possible that no indicator is propopsed by Tenacy.
You still can search for an existing indicators on Tenacy's catalog.
3. Create and associate metrics to a recurring task
If you wish to associate metrics that are not from our catalog with a recurring task / or indicators that are not from our catalog with one of your operated indicators, it is necessary to proceed in several steps :
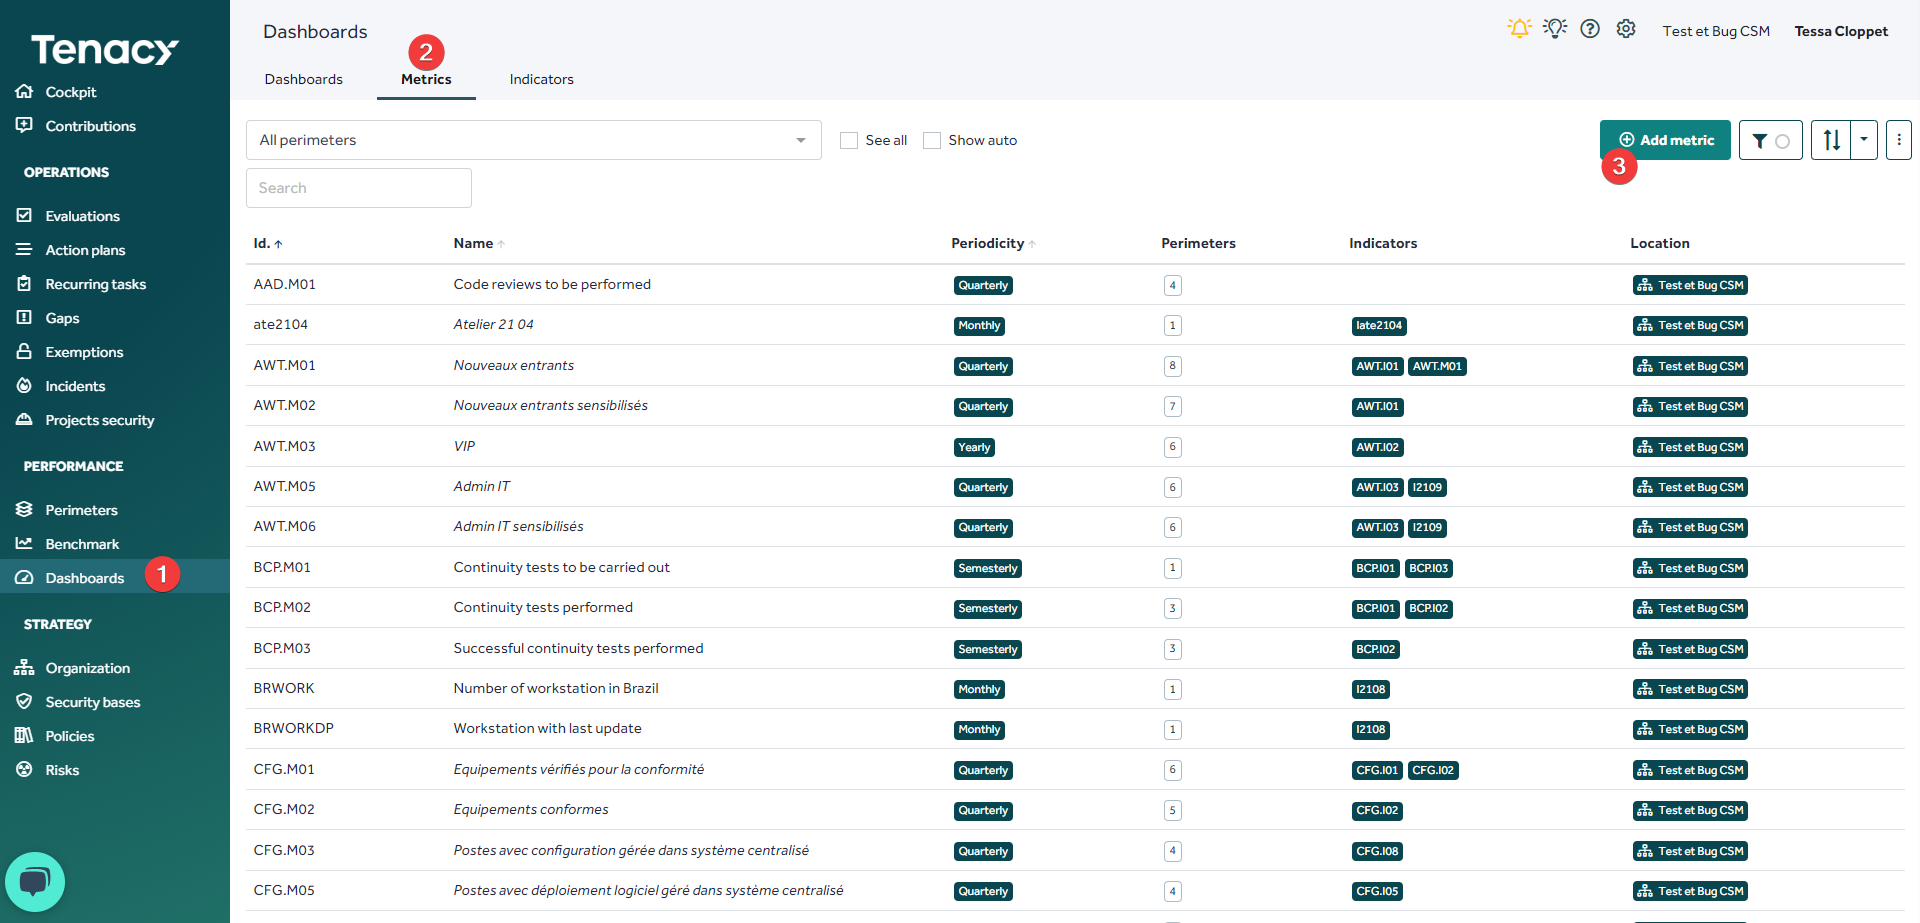
1. Create the metric
Dasboards > "Metrics" tab > "Add a metric" button
2. Set up your metric:
- Name of the metric
- Identifier: not mandatory, if you leave empty the solution will automatically generate an ID
- Periodicity: once there is a history you can no longer change it
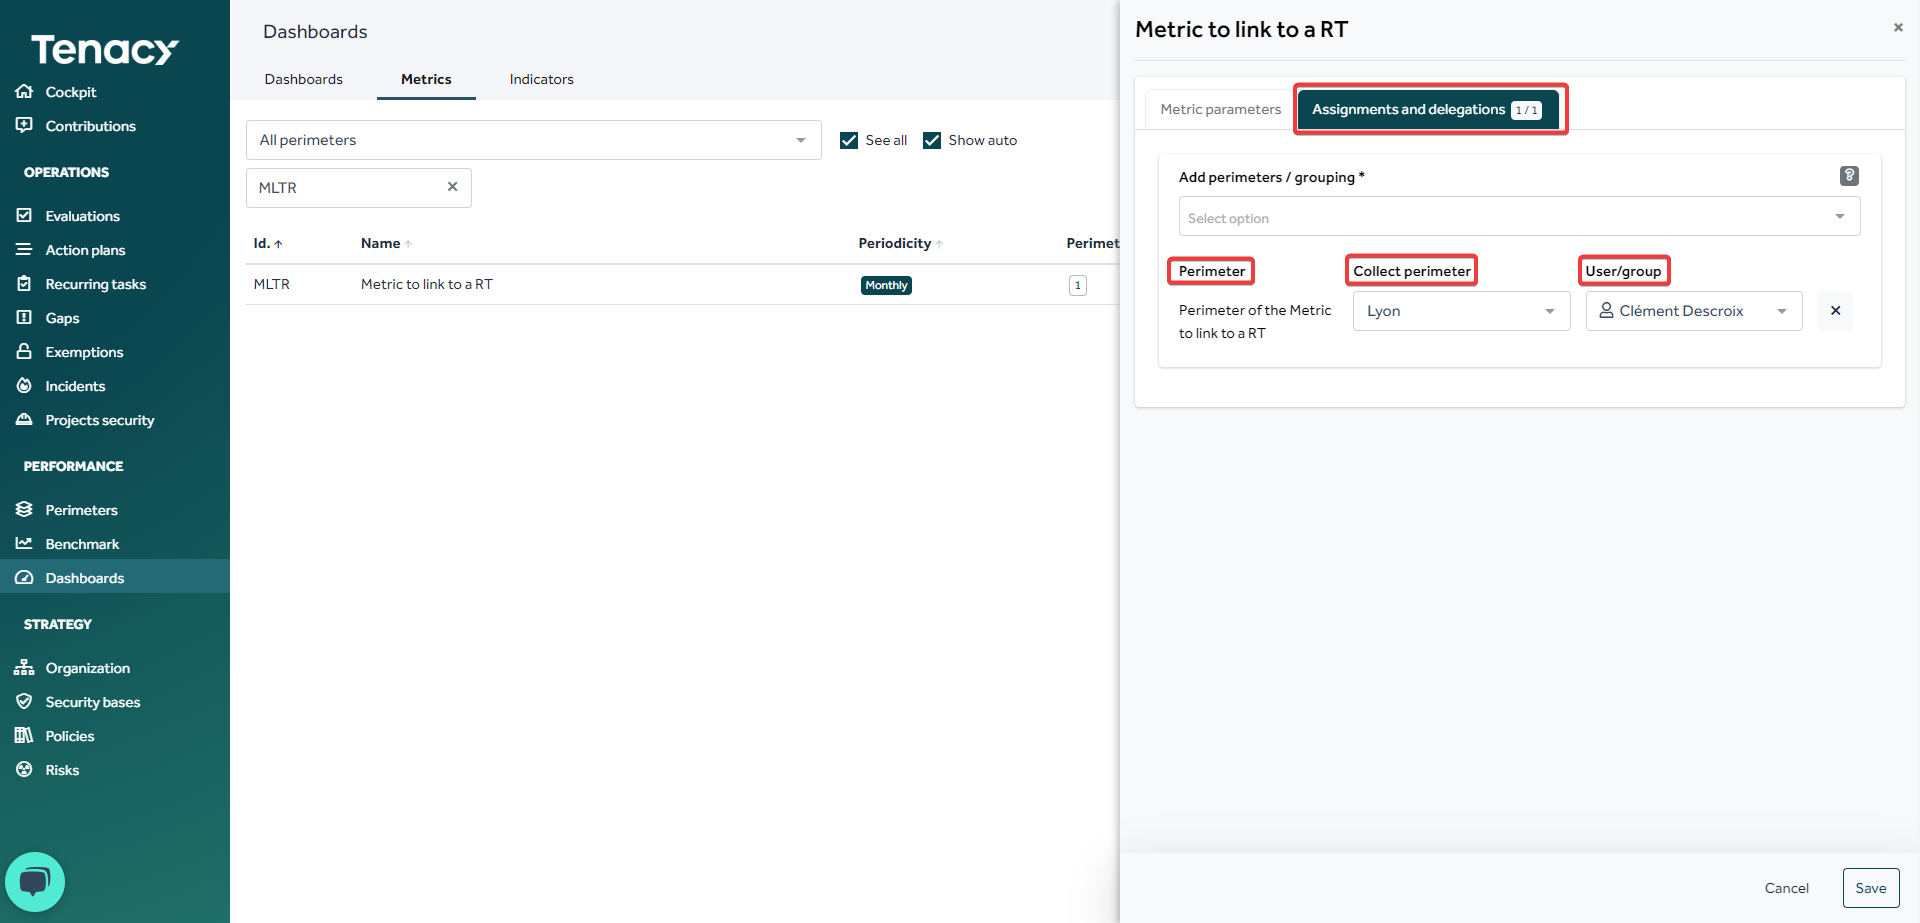
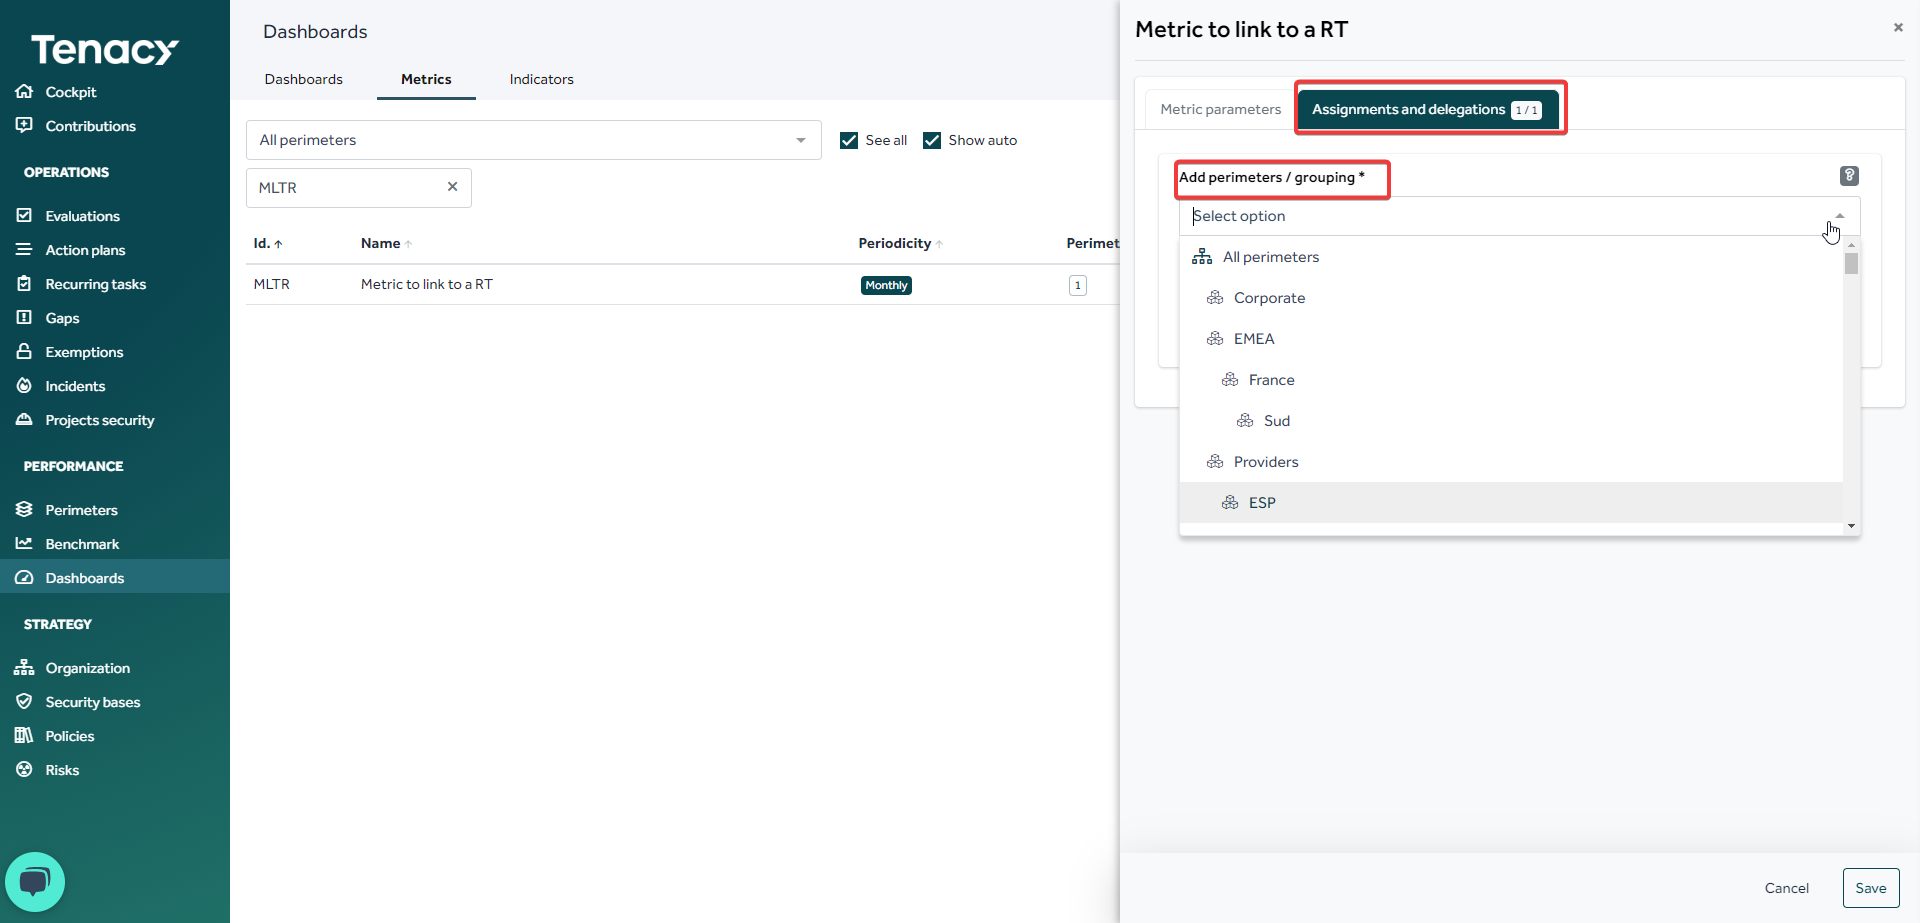
- Grouping / Perimeter: allow to automatically associate the metriv to a group or the associated perimeter.

💡In case you had a perimeter that collects the metric for another perimeter, you can, in the "Assignments and delegations" tab, choose the collect perimeter and/or the user/user group that will collect your metric within the desired perimeter.
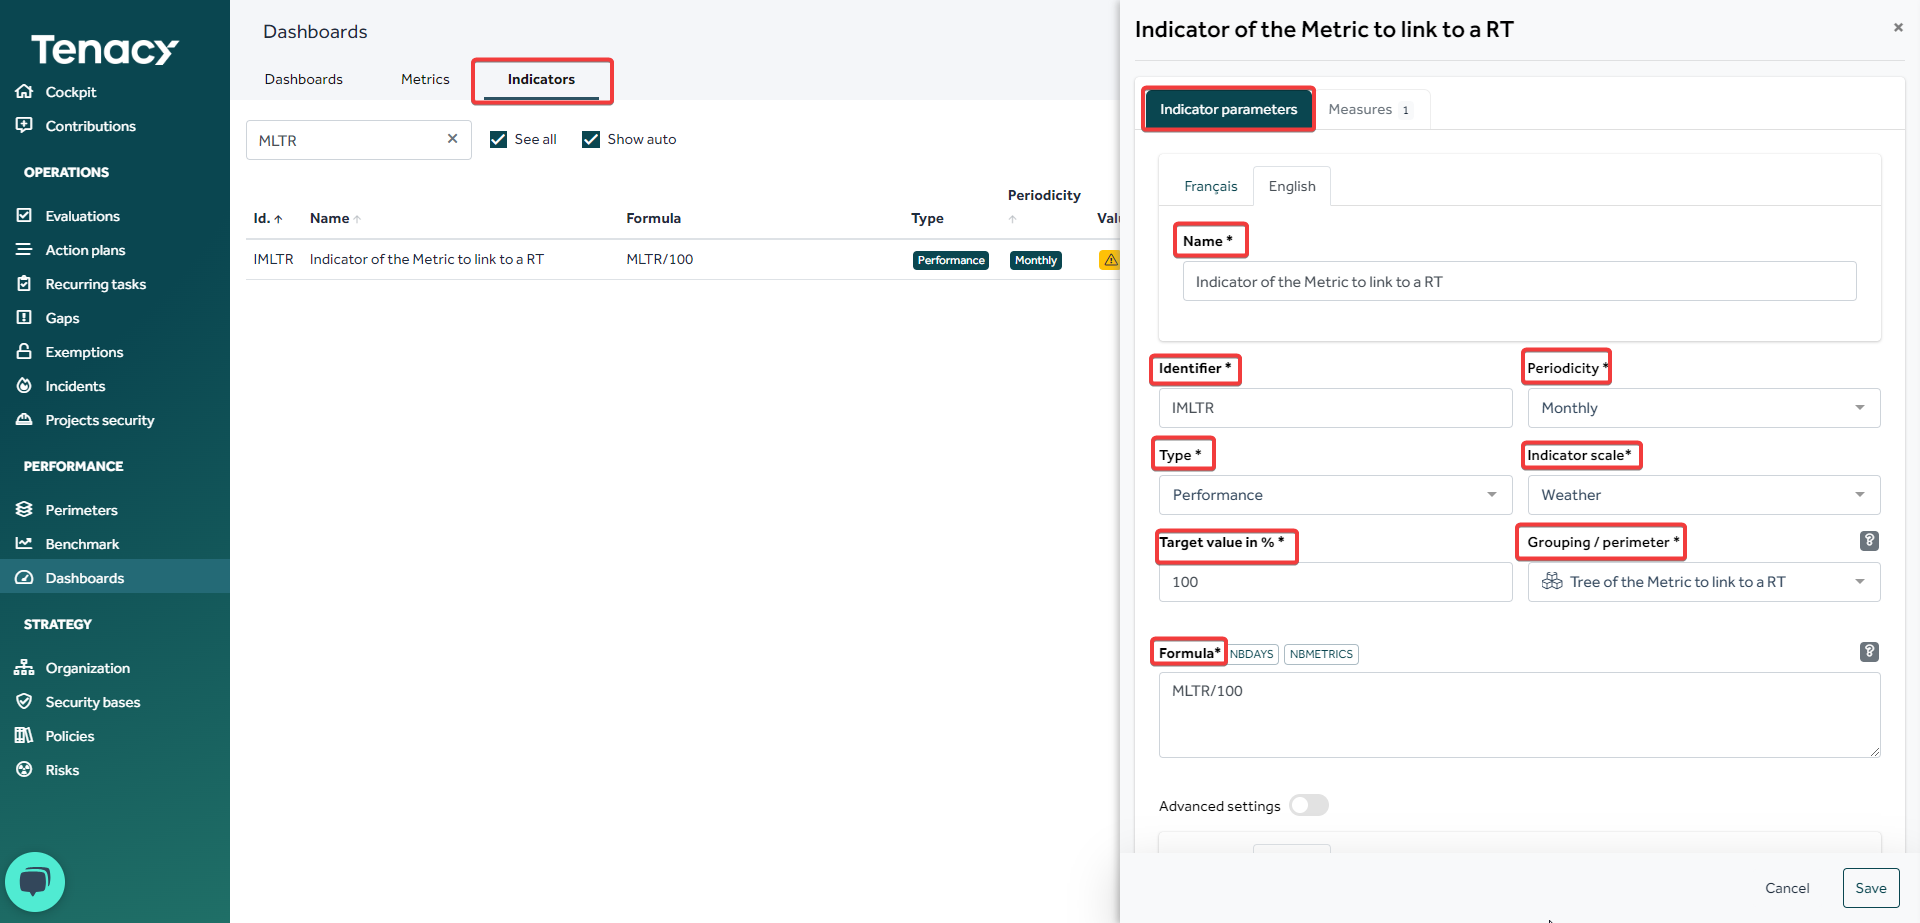
3. Create an indicator powered by my metric:
- Name of the indicator
- Identifier: not mandatory, if you leave empty the solution will automatically generate an ID
- Periodicity
- Type (Performance or Activity)
📈 Performance indicators: its calculated value must be between 0 and 1 (0 to 100%), 1 representing the ideal value. Performance indicators have a target to be achieved and a scale of representation (see below).
🔟 Activity indicators: its value is not limited. It is possible to define a target for the display but there is no associated performance scale. These indicators do not participate in the calculation of the measure's performance.
- Indicator scale
- Target value
- Grouping / Perimeter: allow to automatically associate the metriv to a group or the associated perimeter.
- Formula
The most important element of an indicator is its calculation formula which combines metric values with mathematical and precedence operators: ( ) + - * /
💡 To find a metric more easily type "! " followed by a search term.
Tenacy also offers automatic variables that simplify the writing of certain formulas:
__NBDAYS is replaced by the number of days in the calculated period (month, quarter, ...), facilitating the calculation of averages per day__NBMETRICS is replaced by the number of metrics in the formula, facilitating the averaging calculation of several metrics (ex. (ME01 + ME02 + ME0n) / __NBMETRICS).
4. Link my indicator to my measure
You can then go to the "Recurring tasks" tab, you click on the RT to which you want to link this metric.
4. Do a test
In order to verify that the configuration suits you, you can perform a test by validating a RT to which you have associated your metric.
Go to "Recurring Tasks", select the register where your RT is stored, then click on the blue box to access the completion panel.
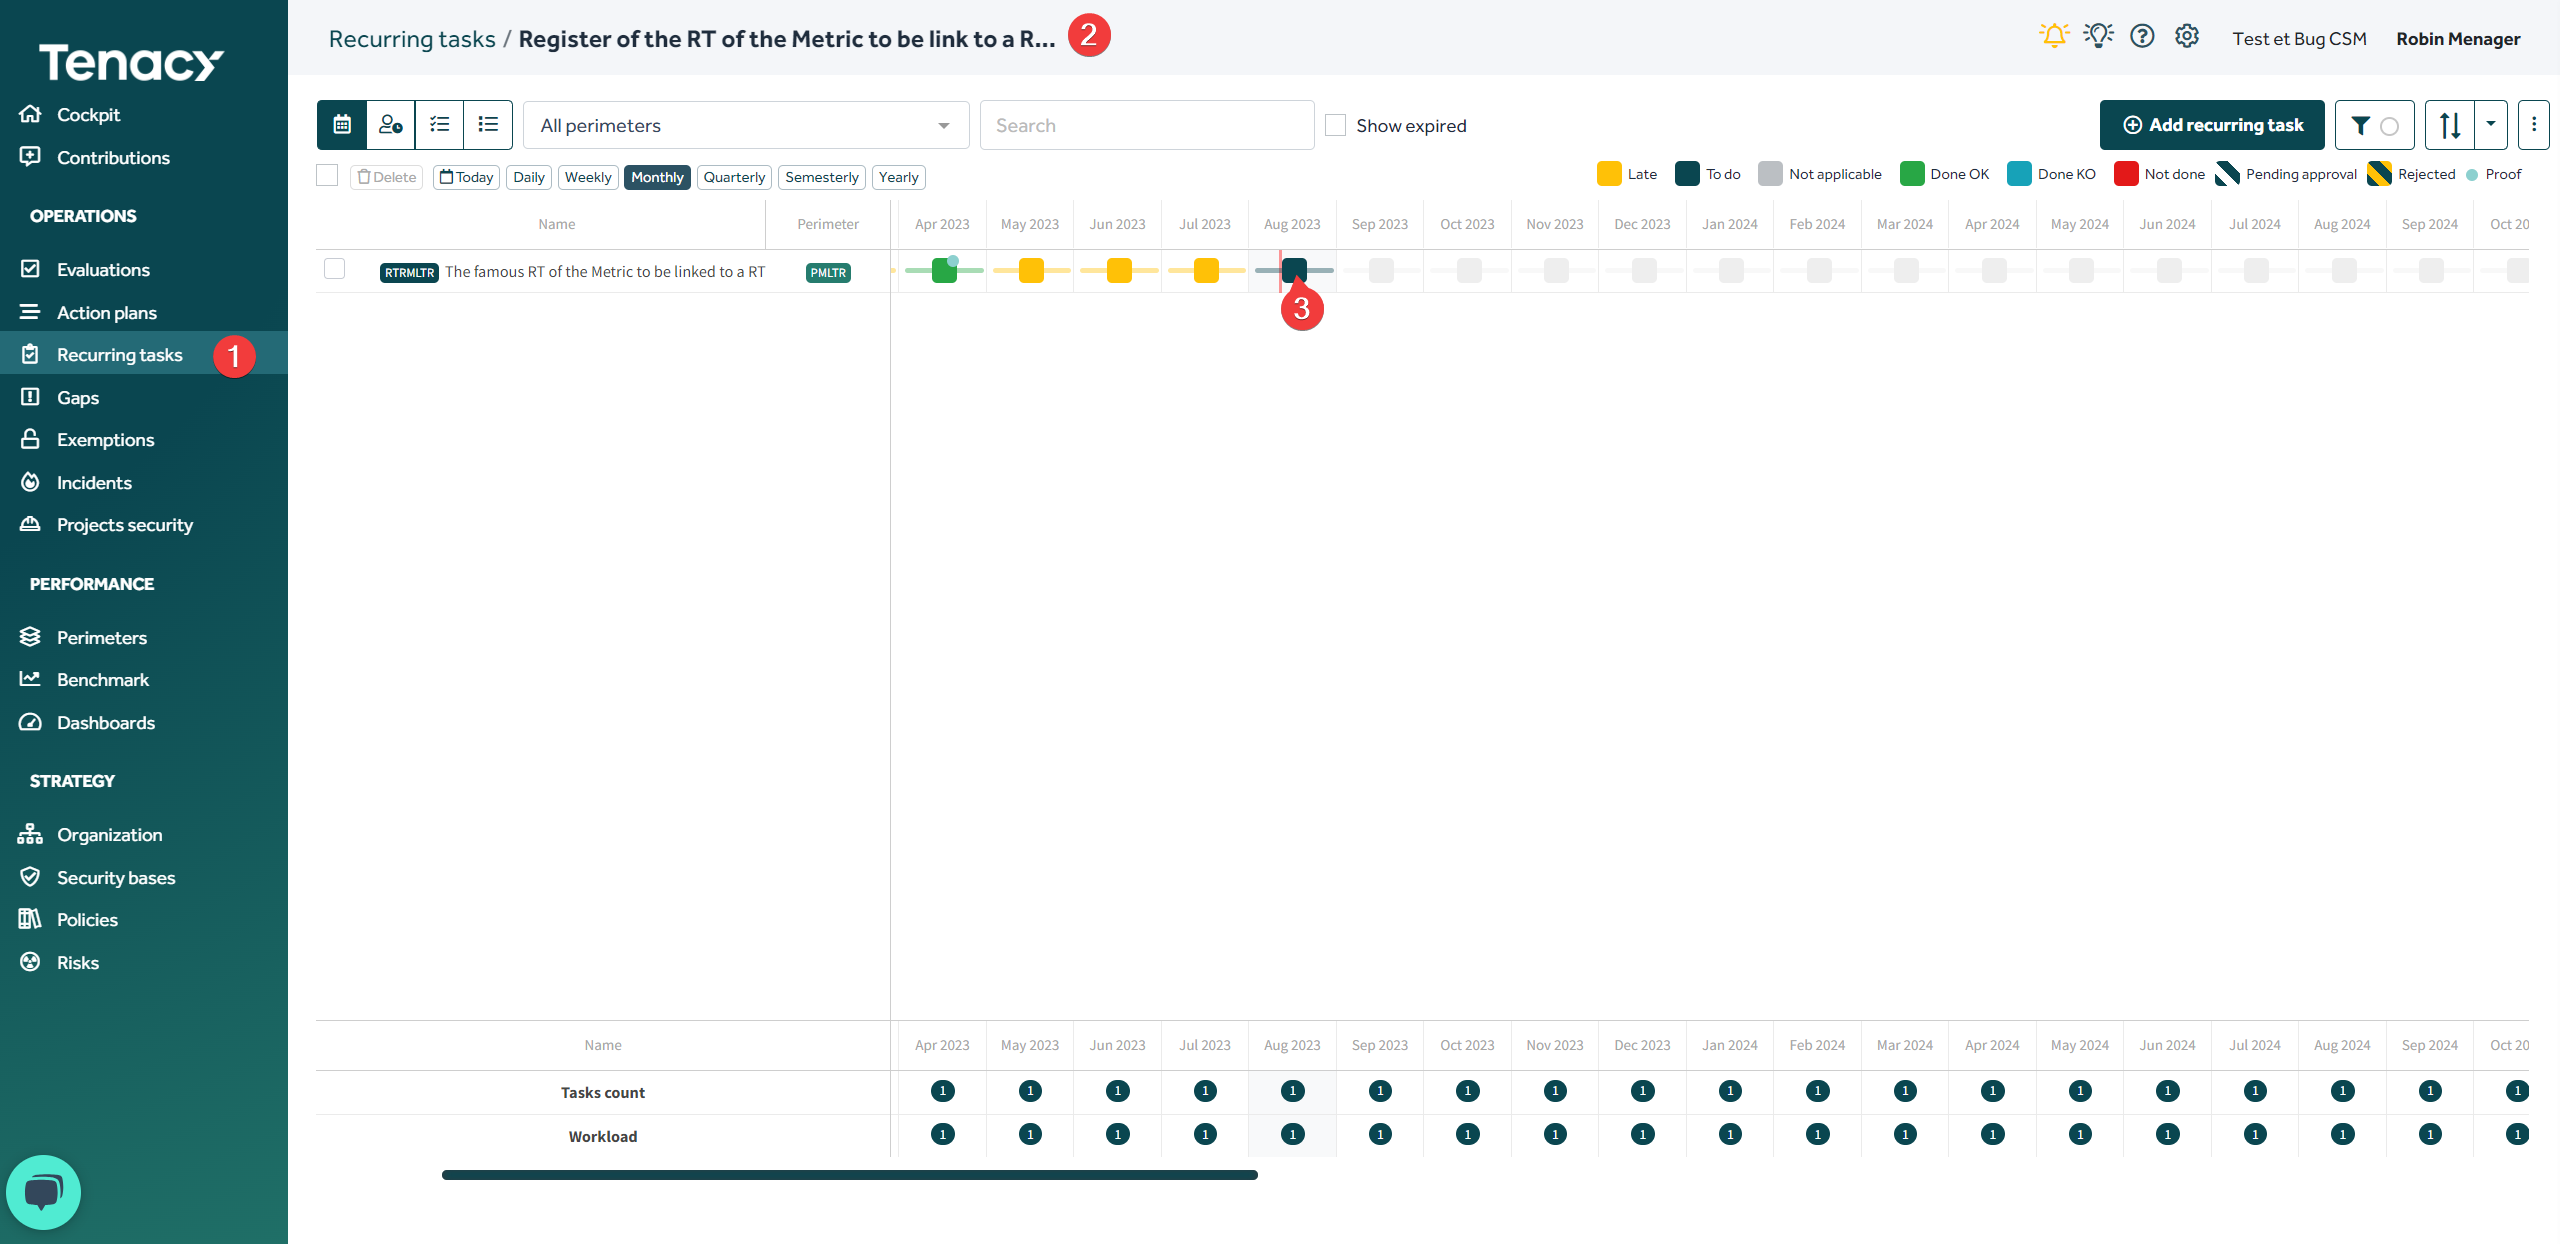
Switch the RT to "Done" then click on "save". A pop-up appears to enter the metrics associated with your RT.

In addition to the values entered, you can associate a comment if necessary.
Finally, if you wish to modify the values entered for a metric during the performance of a RT, you can click on the performance date that interests you, click on "save" then modify or delete the values that appear in the pop-up.